





Direct burial is one of the most cost-effective ways to place outside-plant fiber, but it comes with a trade-off: once the cable is in the ground, it is hard to reach and expensive to repair. That makes the decisions you take before backfilling the trench the ones that determine how the link performs for the next 25 years. The real threats to a buried route are crush load from traffic and settlement, longitudinal water migration, rodents, corrosive or chemically active soil, and third-party excavation. This guide walks through how to protect against each of them, from cable selection to acceptance testing.
A note on numbers: burial depths, separation distances and conduit rules vary by country, by local telecom and roadway codes, and by the specific product. Treat the figures below as typical references and always confirm them against your local standards and the manufacturer data sheet.
1. Choose a Cable Rated for Direct Burial
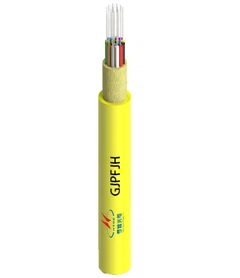
The single most important step is selecting a cable that is actually qualified for direct burial rather than for duct or aerial use. A direct-burial rating means the cable has been tested for crush, impact and, in most cases, rodent resistance. Hengtong's direct-buried fiber optic cable range is a useful reference point for the structures described here.
Three parts of the construction matter most:
- Armor. Armor provides crush protection and a hard barrier against rodents. The common misconception is that every buried cable "must be double armored." In practice a single corrugated steel-tape armor can be perfectly adequate for ordinary soil, while double-armored or double-jacketed designs are chosen where crush load, rock, or rodent pressure is high. Where grounding or lightning exposure is a concern, an all-dielectric armored design may be preferred. The right choice depends on soil, expected loading, rodent risk, installation method and the tested rating - not a blanket rule. For a breakdown of the layers and their designations, see this overview of armor layer options and their material codes.
- Water blocking. Buried cable sits in wet soil for decades, so the core must resist water travelling along the cable. Modern designs use dry water-swellable tapes and yarns or gel filling; the job of these materials is to block longitudinal water migration and protect the cable components and long-term optical performance, not to stop water from "dissolving" the glass fiber itself.
- Strength member and jacket. A steel central strength member adds robustness; a fiberglass (FRP) member keeps the cable fully dielectric. The outer jacket is typically a polyethylene grade for general burial, with specialized jackets for aggressive environments.
common buried-cable structures
| Structure | Typical use | Notes |
|---|---|---|
| Single corrugated steel-tape armor, single jacket | Ordinary soil, moderate crush and rodent risk | Cost-effective; still provides mechanical and rodent protection |
| Double-jacket / double-armored | Rocky ground, heavy loading, high rodent pressure | Greater crush resistance; heavier and larger diameter |
| All-dielectric (FRP, no metal) | High-lightning or high-EMI areas, sites where grounding is undesirable | No bonding/grounding required; confirm it carries a direct-burial rating |
Where rodents are a known problem - agricultural land, wooded areas, some coastal regions - it is worth stepping up to a purpose-built rodent-resistant cable design rather than relying on burial depth alone.

2. Determine the Required Burial Depth
"Bury it deep enough" is not an answer an installer can act on. Depth is driven by three things: local code, the load above the cable (pedestrian, roadway, agricultural), and frost penetration. As general references, underground telecom cable is commonly placed around 0.9–1.2 m (3–4 ft) deep, direct-buried armored cable is often specified at roughly 1.2 m (4 ft) or per the project specification, and cover under roadways is frequently deeper, with many specifications calling for at least 800 mm (about 32 in) of cover, usually achieved with bored conduit. In cold climates the cable should sit below the frost line, which can push depths considerably deeper. These ranges are consistent with published FOA outside-plant construction guidance, but your governing figure is always the local code. For a fuller discussion see this reference on how deep to bury fiber optic cable.
| Condition | Typical cover (verify locally) |
|---|---|
| Normal ground, foot traffic | ~0.9–1.2 m (3–4 ft) |
| Under roadways / vehicle loading | ≥ 800 mm (32 in), often via bored conduit |
| Frost regions | Below the local frost line (can exceed the above) |
Depth is not the whole story. Even a correctly buried cable can be damaged during pulling if you exceed its maximum tension or violate its minimum bend radius. Both limits come from the cable data sheet, and both are easy to breach when plowing or pulling through a tight trench. Control tension and bend radius during installation as carefully as you control depth.
3. Prepare the Trench and Backfill
A large share of early-life faults trace back to what surrounds the cable, not the cable itself. Good trench practice looks like this:
- Clear and level the trench floor; remove sharp stones, roots and debris.
- Lay a bedding of fine, granular material (sieved sand or soft soil) so the cable is not resting on hard points.
- Place the cable without exceeding its bend radius; add padding material on both sides so it cannot shift laterally.
- Backfill in compacted layers rather than one dump; keep large stones (roughly larger than 150 mm / 6 in) out of the fill against the cable.
- Install a detectable warning tape above the cable, typically about 300 mm (12 in) below the finished surface, so a future excavator meets the tape before the cable.
-

4. Protect Road Crossings and Building Entries
Crossings and entries are stress points. Directional boring is the preferred way to cross roads because it avoids cutting the surface and lets you place a protective conduit in one pass. At shallow cover, a rigid conduit - PE, HDPE or PVC sized to the cable's outer diameter with an appropriate fill ratio - or a concrete slab adds crush protection. Seal duct ends where cables enter buildings or handholes to keep water and vermin out. Maintain separation from high-voltage power: many specifications require on the order of 600 mm horizontally and 300 mm vertically, with a physical barrier where that cannot be met. Match the conduit and jacket to the environment using this guide to sheath and jacket materials such as PE, HDPE, PVC and LSZH.
5. Prevent Water Ingress and Corrosion
The point of a water-blocking design is to stop water from running the length of the cable and to protect the buffer tubes, strength members and long-term attenuation performance. Understanding how fiber cables achieve waterproofing helps in choosing dry versus gel-filled constructions. For corrosion, the jacket does the work: a standard polyethylene jacket suits most soils, but chemically active ground, industrial sites and some coastal soils justify a jacket specified for that exposure. Rather than declaring "special anti-corrosion structures are necessary" everywhere, match the jacket to the measured soil and water conditions on the route.
6. Ground and Bond Metallic Armor
If the cable contains metallic armor or a metallic strength member, those components can carry stray current and must be bonded and grounded at building entrances and splice points in line with the applicable electrical code (for example the NEC in the United States). This is a safety requirement, not an optional extra. If grounding is impractical or the site is lightning-prone, an all-dielectric cable removes the requirement entirely. The FOA construction reference cited above summarizes the bonding and grounding expectation for metallic outside-plant cable.
7. Mark the Route and Guard Against Future Digging
The most common cause of buried-cable outages is not the soil or the water - it is someone else's excavator. The Common Ground Alliance reports that damage to buried utilities costs the United States roughly tens of billions of dollars a year, and that the leading root cause is simply failing to notify the one-call service before digging. Protect the route accordingly:
- Warning tape above the cable and permanent route markers at key points.
- A tracer (locate) wire alongside dielectric cable so it can be found electronically later.
- Accurate as-built records with GPS coordinates of the route, splice points and handholes.
- Registration with the local damage-prevention program - in North America that is the 811 "call before you dig" system.
8. Protect Splice Closures, Slack and Handholes
The cable itself is often the strongest part of the route. The weak points are the splice closures, handholes, stored slack and transitions into buildings. Store cable slack in loops that respect the minimum bend radius, use watertight closures, label everything, and seal duct entries. These are the places you can actually inspect later, so build them to be inspectable.
9. Test and Document the Installed Link
Because a buried cable cannot be inspected visually once it is covered, testing and documentation are your maintenance baseline. A sound acceptance routine includes:
- An OTDR trace of each section immediately after plowing or pulling, to catch installation damage before backfill.
- End-to-end insertion loss measured against the design loss budget.
- A stored OTDR baseline and as-built drawing, so any future fault can be located by comparison rather than by digging blind.
Keep those records; they are what turn a future outage from a day of excavation into a targeted repair. See Hengtong's overview of fiber optic cable testing and the FOA reference on OTDR testing and trace analysis for method detail. Note that "regular visual inspection for rodent bites" is not realistic for a fully buried span - the practical maintenance targets are route markers, handholes, closures, building entries and optical performance over time.
FAQ
Q: How Deep Should Fiber Optic Cable Be Buried?
A: It depends on local code, the load above the cable and frost depth. Typical references are around 0.9–1.2 m (3–4 ft) in normal ground, at least about 800 mm (32 in) under roadways, and below the frost line in cold climates. Always confirm against local regulations.
Q: Does Direct-Burial Fiber Need Conduit?
A: Not along its whole length - that is the cost advantage of direct burial. Conduit or bored duct is used at higher-risk points such as road and driveway crossings, building entries and shallow-cover sections.
Q: Does Direct-Buried Fiber Have To Be Double Armored?
A: No. Single corrugated steel-tape armor is often sufficient; double armor and all-dielectric designs exist for higher-risk or grounding-sensitive routes. Choose by risk and the cable's tested rating, not by a fixed rule.
Q: How Do You Protect Buried Fiber From Rodents?
A: With armored or purpose-built rodent-resistant cable, adequate burial depth, and conduit at exposed points. Steel-tape armor or a dedicated anti-rodent design is the primary defense.
Q: Should Armored Fiber Cable Be Grounded?
A: If it contains metallic armor or strength members, yes - bond and ground it per the applicable electrical code at entrances and splice points. All-dielectric cable avoids the requirement.
Q: How Is Buried Fiber Tested After Installation?
A: By OTDR trace of each section and end-to-end insertion loss against the loss budget, with the results archived as an as-built baseline for future fault location.
Key Takeaways
- Start with a cable that carries a genuine direct-burial rating and armor matched to the actual risk, not a blanket "double armor" rule.
- Set depth from local code, surface loading and frost - and respect pull tension and bend radius during installation.
- Bedding, padding, controlled backfill and warning tape protect the cable as much as the cable protects itself.
- Assume third-party digging is your biggest long-term threat: mark the route, keep as-builts, and register with the damage-prevention service.