

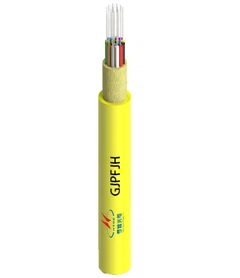


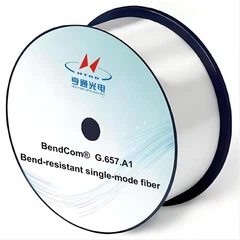
Fiber optic cables form the foundation of high-speed communication systems, transmitting data over vast distances with unparalleled efficiency. While the process of connecting these cables demands precision, it can be mastered with the right tools, techniques, and attention to detail. Below is a streamlined guide to ensure reliable fiber optic connections, whether for permanent installations or temporary repairs.
Essential Tools and Preparation
Begin by assembling the necessary tools: fiber optic cables (single-mode or multi-mode, depending on your application), connectors such as LC, SC, or MTP/MPO, a fusion splicer or mechanical splice kit, a fiber cleaver, stripping tools, and cleaning supplies like isopropyl alcohol and lint-free wipes. Testing equipment, such as an optical power meter, visual fault locator (VFL), or optical time-domain reflectometer (OTDR), is also critical for validating connections. Protective sleeves or heat-shrink tubing may be required for fusion splices.
The Connection Process
The first step involves preparing the fiber. Carefully strip the cable's outer jacket, strength members (like Kevlar), and buffer coating to expose the bare glass fiber, which is typically 125 µm in diameter. Clean the exposed fiber thoroughly with isopropyl alcohol to remove dust or grease. Next, use a precision fiber cleaver to score and snap the fiber, ensuring a clean, perpendicular cut. Inspect the end face under a microscope to confirm a smooth finish, as uneven cuts lead to signal loss.

Connecting the fibers can be done via fusion splicing, mechanical splicing, or connectorization. Fusion splicing, ideal for permanent installations, involves aligning the fiber ends in a fusion splicer and using an electric arc to melt and fuse them. This method offers minimal loss (often below 0.1 dB) and high reliability but requires specialized equipment. For quicker fixes, mechanical splicing uses a V-groove clamp to align fibers, secured with index-matching gel to reduce reflections. While less precise than fusion splicing, it's cost-effective for field repairs.
When terminating a fiber with a connector (e.g., LC or SC), thread the pre-polished connector onto the prepared fiber, secure it with epoxy or a crimp mechanism, and polish the end face using progressively finer abrasive films. This ensures a smooth surface for optimal light transmission.
Testing and Quality Assurance
After connecting the fibers, rigorous testing is essential. Visually inspect connector end faces under a microscope for scratches or contamination. Measure optical loss using a light source and power meter, ensuring values fall within acceptable thresholds (e.g., ≤0.3 dB for fusion splices). For deeper analysis, an OTDR can map the entire fiber link, identifying splice losses, bends, or breaks.
Key Considerations for Success
Safety and best practices are paramount. Always avoid direct exposure to laser light by using a power meter to confirm inactive fibers. Maintain the cable's minimum bend radius to prevent micro-cracks, and keep connectors capped when unused to block dust. Labeling fibers clearly simplifies future maintenance, while a clean workspace minimizes contamination risks-the leading cause of signal degradation.
Common pitfalls include improper cleaning, angled cleaves, and over-tightening connectors, all of which compromise performance. A meticulous approach, adherence to standards like TIA/EIA-568, and prioritizing testing ensure robust, low-loss connections capable of supporting high-bandwidth applications.
Conclusion
Connecting fiber optic cables is a blend of technical skill and disciplined execution. By mastering preparation, splicing methods, and validation protocols, engineers can deploy resilient networks that meet the demands of modern telecommunications, data centers, and beyond. Whether for long-haul infrastructure or localized repairs, precision and cleanliness remain the cornerstones of successful fiber optic connectivity.