




Fiber optic cable installation is easiest to manage when the work is treated as a controlled process rather than a single cable pull. Route conditions, cable construction, installation limits, tools, splicing, connector cleanliness, testing, safety, and documentation all affect whether the completed link performs as intended.
The most useful rule throughout the job is to keep the manufacturer's specification for the actual cable in front of the installation team. General installation guidance can help with planning, but product-specific limits for bend radius, pulling tension, crush resistance, temperature, and approved installation methods should take priority.
The ten steps below organize the job in the same order a project team typically needs to make decisions: plan first, select the right cable and method, prepare the tools, protect the cable, define testing, manage route-specific risks, complete splicing and connections, work safely, and know when the project needs specialist support.

1. Map the Route Before the Reel Reaches the Site
A good installation plan should answer more than "where does the cable start and end?" It should show how the cable will travel between those points and identify the sections most likely to create installation risk.
Walk the proposed route and record:
- conduit, innerduct, microduct, cable tray, ladder rack, handholes, vaults, pull boxes, poles, and termination rooms;
- changes in direction and locations where bend control will be difficult;
- crowded pathways or sections with limited access;
- water, moisture, UV, chemicals, heat, cold, or mechanical exposure;
- underground utilities and excavation areas;
- potential cable-crush points, sharp edges, and temporary traffic routes;
- planned splice, closure, patch-panel, and termination locations;
- safe spaces for reel staging, temporary loops, or figure-eight cable handling;
- permit, access-window, code, and site-safety requirements.
The route survey should also identify where the installation crew can stop and inspect the cable during a long placement. Finding a blocked duct, inaccessible pull box, or unsuitable bend before the pull begins is much less expensive than discovering it after the cable is under tension.
For underground projects, route planning deserves extra attention because duct condition, existing services, water ingress, access points, and excavation constraints can change both the installation method and the cable construction required.

2. Select Cable for the Real Installation Environment
Fiber count and optical performance are only part of cable selection. The cable also has to survive the environment and the installation method.
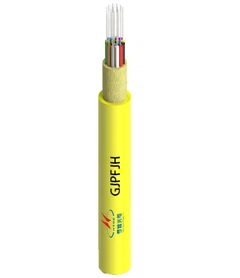
Indoor, outdoor, duct, aerial, direct-burial, armored, fire-resistant, and other cable constructions solve different problems. An indoor cable that performs well in a protected telecommunications room should not be treated as interchangeable with a cable intended for wet ducts or exposed outside-plant routes.
Before selecting the cable, confirm:
- whether the link requires single-mode or multimode fiber;
- the required fiber count and any planned spare fibers;
- indoor, outdoor, underground, aerial, or mixed-route exposure;
- moisture, UV, chemical, temperature, rodent, impact, or crush exposure;
- required jacket or fire-performance characteristics;
- whether the cable will be pulled, blown, buried, suspended, or placed in tray;
- the termination and splicing method;
- available conduit space and hardware dimensions.
If the fiber type is still being evaluated, the site's guide to single-mode vs multimode fiber can help separate transmission requirements from the cable's physical installation requirements.
For every selected cable, gather the product data before work begins. The crew should know the cable outside diameter, minimum bend radius, maximum installation pulling tension, environmental rating, approved installation method, and any requirements for pulling eyes, grips, strength members, or lubricant.
3. Prepare the Right Placement, Splicing, and Test Tools
The correct tool set depends on how the cable is being installed and how it will be terminated. A cable-pulling crew, a blowing crew, and a splice crew may need very different equipment even when they are working on the same link.
Cable Placement Equipment
Typical equipment can include:
- reel stands sized for the cable reel;
- pulling grips or factory-installed pulling eyes;
- swivels;
- pull rope;
- rollers, sheaves, quadrants, and corner guides;
- tension-controlled pulling equipment;
- compatible pulling lubricant where specified;
- duct cleaning, proving, or blowing equipment;
- temporary barriers and cable protection.
The diameter of rollers and sheaves matters because the cable must maintain its permitted bend radius while moving. A tool can be mechanically strong enough for the job and still be unsuitable if it forces the cable into too tight a bend.
Splicing and Termination Equipment
Depending on the design, technicians may need fiber strippers, cable preparation tools, precision cleavers, a fusion splicer, splice protectors, splice trays, connector termination tools, inspection equipment, approved cleaning supplies, and a dedicated container for fiber scraps.
When fusion splicing is part of the design, review the site's fusion splicing guide for process background, while following the actual cable, splicer, enclosure, and splice-protector instructions used on the project.
Testing Equipment
The test kit may include a light source and optical power meter, optical loss test equipment, a visual fault locator where appropriate, inspection equipment, and an OTDR with suitable launch and receive fibers when the test plan requires it.
Test instruments should match the fiber type, connector type, wavelength, link length, and acceptance method. Bringing an OTDR to the site is not enough if the crew has not defined how it will be set up or what result will constitute a pass.
4. Protect the Cable from Bending, Pulling, Twisting, and Crushing
Most mechanical damage is preventable when the crew watches the entire cable route rather than concentrating only on the pulling end.
The Fiber Optic Association notes that fiber optic cable specifications include limits such as pulling tension, minimum bend radius, and crush loads. It also gives a commonly used planning guideline of about 20 times the cable diameter for minimum bend radius while the cable is under pulling tension and 10 times the cable diameter after installation, while emphasizing that individual cable specifications can differ. See the FOA guidance on fiber optic cable bend radius.
Use those ratios only as general planning guidance. If the product datasheet gives a different value, use the product value.
Stage the Reel Correctly
Position the reel so cable pays off smoothly in the intended direction. Avoid removing cable from the side of the reel in a way that adds a twist with every turn.
For long routes that require temporary cable storage, prepare a clean and protected handling area. Figure-eight handling can help manage long lengths without accumulating twist, but the loops still need to respect the cable's mechanical limits and remain protected from vehicles, tools, debris, and sharp surfaces.
Stop When Pulling Resistance Changes Unexpectedly
A cable that suddenly becomes difficult to move may be encountering a blocked duct, a tight bend, an incorrectly positioned roller, a jammed grip, tangled cable, or another route problem. Increasing the pulling force without inspecting the cause can convert a recoverable installation problem into permanent cable damage.
When tension control is required, use suitable equipment and the cable's rated installation limit. Do not estimate acceptable tension only by feel.
Support the Cable Without Squeezing It
Once the cable is in place, keep clamps, ties, tray entries, rack transitions, cabinet entrances, and service loops within the required mechanical limits. Cable should be supported, not compressed into a neat-looking bundle.

5. Define the Test Plan Before Installation Starts
Testing is more useful when the project defines the required measurements before cable placement rather than deciding what to test after the link has already been terminated.
A complete test plan should identify:
- whether pre-installation baseline testing is required;
- continuity and polarity requirements;
- insertion-loss test method and wavelengths;
- OTDR requirements, if any;
- reference cords or launch and receive fibers;
- pass/fail limits;
- test file naming and report format;
- how failed results will be investigated and documented.
Pre-installation testing can be useful when a project needs evidence of cable condition before placement, particularly for long runs, high-value reels, difficult logistics, or contracts where responsibility for damage must be clearly documented. It is not automatically necessary on every installation.
Use Insertion-Loss Testing and OTDR for the Questions They Answer
End-to-end loss testing and OTDR testing should not be treated as substitutes for one another. An insertion-loss test measures the optical loss of the link using the specified reference method. An OTDR can help characterize distance, splices, connectors, and other events along the fiber.
The FOA's OTDR testing guide describes the importance of suitable launch and receive cables, clean connectors, correct setup parameters, trace interpretation, and test documentation.
For more site-specific background, see fiber optic cable testing.

6. Adapt the Installation Method to Conduit, Underground, Aerial, or Air-Blown Routes
One of the biggest installation mistakes is applying the same field procedure to every route. The workflow should change with the pathway and cable design.
Conduit Pulling
Before a conduit pull, inspect and prepare the route, confirm access at pull boxes, verify the pull rope and pulling hardware, and protect the cable where it enters or exits the duct. Tight changes in direction can multiply pulling resistance and increase the chance of bend-radius violations.
For projects designed around duct placement, review the available duct fiber optic cable constructions and use the selected product's installation data to plan the pull.
Air-Blown Installation
Air-blown placement depends on a compatible cable-and-duct system. Duct continuity, cleanliness, internal condition, size, route geometry, equipment setup, and cable design all matter.
When the route is intended for blowing, compare the project requirements with air-blown fiber optic cable options rather than assuming that any conventional cable can be installed with the same method.
Direct Burial
Direct-burial routes add soil, water, mechanical protection, route marking, future excavation, separation, and local construction requirements to the installation plan. The cable must be designed for the buried environment.
Use appropriate direct-burial fiber optic cable for routes that call for this method, and follow the project specification for trenching, protection, warning systems, depth, and local code requirements.
Aerial Installation
Aerial routes introduce pole hardware, span loading, cable support, sag or tension, clearances, wind, ice where applicable, traffic exposure, and work-at-height hazards. The installation procedure must match the specific aerial cable design and engineered support system.
For cable selection, review aerial fiber optic cable constructions and the installation limits of the selected product.
Underground Utility Protection
Where excavation is required, identify existing underground services before digging and follow the applicable utility-location process. In the United States, OSHA's Specific Excavation Requirements require the estimated location of utility installations to be determined before excavation begins and additional precautions as work approaches them.
Projects outside the United States should follow the equivalent local excavation, utility-location, permitting, and occupational-safety requirements.
7. Control the Splicing Process Instead of Treating It as a Final Detail
Splicing quality affects both optical performance and future maintainability. A good cable pull does not compensate for poor fiber preparation, contaminated equipment, inconsistent cleaves, poor splice protection, or disorganized tray routing.
Before splicing:
- confirm the correct cable and fiber identification;
- prepare the work area to keep dust, water, and debris away from exposed fibers;
- verify the cleaver and splicer are in suitable condition;
- use the correct strip lengths and preparation method for the cable;
- prepare the enclosure and splice trays before fibers are exposed;
- keep fiber routing within the tray's bend-management design.
After each splice, follow the project procedure for splice evaluation and protection. Avoid treating a splicer's displayed estimate as the only acceptance criterion if the project requires additional testing.
Splice records should identify the cable, fiber, location, and any result required by the project documentation. That information makes future troubleshooting much faster than a tray containing anonymous fibers and no usable record.
8. Match Connectors Correctly and Keep End Faces Clean
Connector problems can produce high loss or reflectance even when the installed cable is undamaged. Connector type, polish, fiber type, adapter compatibility, cleanliness, and termination quality all need to match the link design.
Before mating a connector:
- confirm the connector and adapter are the correct type;
- inspect the end face with appropriate inspection equipment;
- clean contamination with an approved method;
- inspect again before mating;
- avoid touching the end face or leaving protective caps off unnecessarily.
New connectors should not automatically be assumed clean. Inspection confirms whether cleaning is actually needed and whether the cleaning process was successful.
Keep connector inspection and cleaning close to the actual connection point. Cleaning a connector and then carrying it uncapped through a dusty construction area can undo the work before it is ever mated.
9. Make Fiber-Specific and Construction Safety Part of the Work Package
Fiber installation has both conventional construction hazards and hazards specific to glass fibers, optical sources, splicing equipment, and cleaning materials.
The FOA's fiber optic installation safety guidance highlights eye protection, safe handling and disposal of fiber shards, chemicals, and other installation hazards.
Handle Fiber Shards as a Controlled Waste
Small bare-fiber scraps can be difficult to see and can penetrate skin or eyes. Keep the work area clean, collect scraps immediately in a dedicated container, and do not leave cleaved fiber on tables, floors, or clothing.
Do Not Look Into a Fiber to Check Whether It Is Active
Many wavelengths used in optical communications are not visible to the human eye. Establish whether optical power is present using appropriate test equipment and the project's safe work procedure rather than direct visual inspection.
Control the Hazards of the Route, Not Just the Cable
Vaults, manholes, tunnels, roadways, pole routes, excavation areas, and locations near energized infrastructure can require additional controls such as atmospheric testing, traffic management, fall protection, electrical clearances, permits, or rescue procedures.
If the installation crosses a hazard category the crew is not trained or equipped to manage, the correct response is to bring in qualified personnel rather than treating the task as a normal cable placement.
10. Know When the Project Needs Specialist Fiber Installers
Some indoor pre-terminated links are straightforward. Other projects combine outside-plant construction, specialized equipment, splicing, testing, and regulated work environments. The difference should be recognized before installation begins.
Professional or specialist installation becomes increasingly valuable when a project involves:
- excavation or underground utility exposure;
- aerial construction and work at height;
- long, high-friction, or multi-stage pulls;
- high-fiber-count or specialized cables;
- air-blown systems requiring dedicated equipment;
- fusion splicing and closure work;
- confined spaces or restricted-access infrastructure;
- regulated building pathways;
- formal OTDR and insertion-loss acceptance testing;
- limited outage or access windows where rework would be expensive.
This is a project-risk decision, not a universal rule. Compare the work scope with the crew's actual training, safety qualifications, placement equipment, splicing tools, test capability, and ability to correct a failed installation.
Fiber Optic Cable Installation Checklist
Before Installation
- Confirm the route, start point, end point, and access locations.
- Inspect conduit, tray, pull boxes, poles, handholes, or other infrastructure.
- Identify excavation, electrical, traffic, work-at-height, confined-space, and site-specific hazards.
- Verify cable type, construction, reel ID, length, and fiber count.
- Review the manufacturer's cable specification sheet.
- Confirm the approved placement method.
- Prepare placement, splicing, inspection, cleaning, and testing equipment.
- Define crew communication and stop signals.
- Define the acceptance test plan and documentation format.
During Installation
- Pay cable off the reel without introducing unnecessary twist.
- Maintain the specified bend radius at rollers, conduit entrances, trays, racks, and service loops.
- Monitor pulling tension when the project requires it.
- Protect cable from crushing, sharp edges, traffic, and uncontrolled temporary loops.
- Stop and inspect the route when resistance changes unexpectedly.
- Keep connectors capped until they are ready for inspection and mating.
- Keep fiber scraps and splicing debris controlled.
After Installation
- Support and secure the cable without deforming the jacket.
- Store service loops within the cable's bend requirements.
- Splice or terminate according to the component procedures.
- Inspect, clean, and re-inspect connectors before mating.
- Complete all required acceptance tests.
- Investigate failed measurements before pathways are permanently closed.
- Label cables, fibers, closures, panels, and termination points.
- Save test reports and OTDR traces where required.
- Update as-built drawings and route records.
Frequently Asked Questions
What should be checked before installing fiber optic cable?
Check the route, cable type, environment, product datasheet, installation method, access points, safety hazards, tools, termination design, and test plan. Planning these items before the cable moves is one of the best ways to prevent avoidable installation problems.
What is the most important fiber optic cable installation limit?
There is not one universal limit that replaces the others. Minimum bend radius, maximum pulling tension, crush resistance, temperature limits, and installation-method restrictions can all matter. Use the actual cable manufacturer's specifications as the primary reference.
How far can fiber optic cable be pulled through conduit?
There is no single safe distance for every cable and route. The practical limit depends on cable weight and construction, rated pulling tension, conduit length, bends, friction, pathway condition, lubricant, pulling equipment, and intermediate access points.
What bend radius should be used for fiber optic cable?
Use the value stated by the cable manufacturer. A common general guideline is approximately 20 times cable diameter while the cable is under pulling tension and 10 times cable diameter after installation, but some cables specify different values.
Should fiber optic cable be tested before installation?
Pre-installation testing is useful when the project needs a baseline condition record, especially for long runs, high-value cable, difficult logistics, or contracts that need to separate shipping damage from installation damage. The quality plan should define whether it is required.
Is OTDR testing required for every fiber optic installation?
No. OTDR testing is useful for characterizing distance and events along a fiber, but the required acceptance tests depend on the network design and project specification. Many projects also use end-to-end insertion-loss testing.
Can fiber optic cable share a conduit with other cables?
The answer depends on the other cable types, pathway classification, cable ratings, space, separation requirements, project specification, and the electrical or building rules that apply in the jurisdiction. Do not decide only by whether the cables physically fit.
Can fiber optic cable turn around a 90-degree corner?
The route can change direction by 90 degrees, but the cable should not be forced into a sharp 90-degree bend. Use conduit bends, rollers, tray transitions, or cable-management hardware that maintains at least the specified minimum bend radius.
What is the difference between installing and terminating fiber optic cable?
Installation places, routes, supports, and protects the cable. Termination prepares the individual fibers for connectors, splice trays, closures, patch panels, or other equipment. They are related parts of one project but use different procedures and tools.
Conclusion
A successful fiber optic cable installation is the result of coordinated decisions rather than one perfect pulling technique. Plan the route, select cable for the actual environment, prepare the correct tools, control bend radius and pulling tension, define testing in advance, adapt the method to the route, splice carefully, manage connector cleanliness, build safety into the work package, and use qualified specialists when the project risk demands it.
Before the installation starts, make sure the crew has three documents available: the route plan, the cable specification sheet, and the test plan. Together, they connect the design, the field procedure, and the final acceptance criteria.