

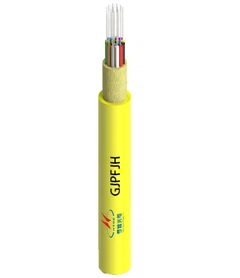



During the extrusion of insulation and jacket layers, keeping the polymer wall centered around the conductor or cable core is one of the most important quality tasks on the production line. When the wall drifts off-center, one side becomes thinner than the other. That thin side becomes the weak point for electrical performance and mechanical protection, while the thick side wastes material on every meter produced. Being able to correct eccentricity quickly, and hold it within tolerance for the whole run, directly affects both product quality and cost.
This guide explains what extrusion eccentricity is, why it matters, how to adjust it on traditional dies, and where fixed-center and self-centering tooling fit in. If you want a broader walkthrough of the topic, we also cover it in our optical fiber eccentricity adjustment guide.
What Is Eccentricity in Cable Extrusion?
Eccentricity is the offset between the center of the conductor (or cable core) and the center of the extruded layer around it. In a perfectly concentric cable, the wall thickness is the same all the way around the circumference. When the core sits off-center inside the die, one side of the wall is thinner and the opposite side is thicker.
Eccentricity is usually expressed as the difference between the maximum and minimum wall thickness, or as a percentage relative to the nominal wall. On the shop floor, operators check it by cutting a ring sample from the extruded cable, slicing it cleanly, and measuring the wall at several points around the circumference (typically top, bottom, left, and right) with a measuring microscope, a profile projector, or a thickness gauge. International test methods such as the IEC 60811 series for measuring overall dimensions and non-metallic wall thickness describe how these measurements should be taken so that results are comparable between operators and laboratories.

Why Eccentricity Control Matters
Poor centering is not just a cosmetic issue. It has consequences that show up in performance, cost, and customer acceptance:
- Electrical and optical protection. The thinnest point of the wall sets the real protective margin. A cable that measures fine on average can still fail where the wall is thin.
- Mechanical durability. A thin jacket wall is more vulnerable to abrasion, crushing, and cracking during installation and over the cable's service life.
- Material cost. To keep the thin side above the minimum, operators often push up the average wall thickness. That extra polymer is spread over the whole length of the run, so a small eccentricity translates into a steady, ongoing material overspend.
- Batch consistency and acceptance. Wall thickness and its variation are standard items on incoming inspection. Cables that drift out of tolerance lead to rejected reels and rework.
How to Adjust Eccentricity in Traditional Extrusion Dies
A traditional die uses a separate tip (core tube) and die, with centering bolts around the die head that let the operator shift the die relative to the tip. Adjusting these bolts is how the wall is brought back to concentric. The methods below are the common ones used in practice. In most shops they are combined rather than used in isolation.
1. Visual Centering (No Load)
Before feeding material, the operator looks down the tooling and adjusts the die so the annular gap between the tip and the die looks even all the way around, then tightens the centering bolts.
When to use: as the first, coarse setup step before every run.
Limitation: it only aligns the empty tooling. It does not account for how the melt actually flows once production starts, so it always needs to be confirmed under load.
2. Centering During Extrusion
Once the polymer is fully molten and flowing, the operator adjusts the centering bolts while material runs, takes periodic ring samples, checks the wall thickness around the circumference, and keeps adjusting until it is uniform. Because melt behavior depends heavily on extrusion temperature and melt flow stability, this step should be done only after the process has reached a steady thermal state.
When to use: the primary fine-adjustment method for most insulation and jacket runs.
Limitation: there is a lag between an adjustment and the sample that shows its effect, so it takes patience and small, incremental moves.
3. Centering with the Cable Core (In-Line Centering)
Suited to small-diameter cables. The core is threaded through the tip and attached to the pulling line, material is fed, and once melt flow stabilizes the extrusion and haul-off speeds are set. A short length is run, the outer diameter is checked against specification, then the line is stopped and a sample is taken. The cycle is repeated until the wall is uniform.
When to use: small-diameter product where the core position itself strongly influences centering.
Limitation: if the core scrapes the tip or is pulled in under side tension, eccentricity returns even on well-centered tooling, so core-path and tension control matter as much as the bolts.
4. Light-Assisted Centering
Used for transparent jackets. A light is shone through the wall so the operator can see thick and thin areas directly and adjust the bolts until the wall looks even from all sides.
When to use: clear or translucent compounds where the wall can be read by eye.
Limitation: it does not work on opaque materials such as black PE or many low-smoke zero-halogen compounds, and it is a visual aid rather than a substitute for measured samples.
5. Centering by Touch (Experience-Based)
An empirical check where an experienced operator feels the wall thickness of the extruded layer by hand and nudges the die accordingly.
When to use: as a quick supplementary judgment during low-speed trial running, in the hands of a skilled operator.
Limitation: it involves working near hot tooling and material, so it carries a burn risk and should follow the line's safety procedures. It is a rough guide only and must never replace measured wall-thickness confirmation before the run is accepted.
A common mistake with all of these methods is chasing the reading after a single sample. Melt flow needs a moment to settle after each adjustment, and moving several bolts at once makes it hard to tell which change did what. Small, single moves with a fresh sample after each one are slower but far more reliable.

Fixed-Center (One-Piece) Dies: Reducing Setup Time
In a fixed-center die, the tip and the die are joined into a single unit, sometimes called an integrated die. Because the two halves are fixed relative to each other, there are no centering bolts to adjust. Three joining methods are typically used: welded, threaded, and pinned.
The welded joint is generally regarded as the most reliable of the three, because a continuous weld fixes the tip and die concentric to each other with no clearance that can shift and no threaded interface that can loosen under thermal cycling. That stability is what a fixed-center die is designed to deliver.
Eliminating the adjustment step has two practical benefits. It removes the trial-and-error material that a traditional die scraps during centering, and it shortens both die changeover and setup time, so the line spends more time producing in-spec cable. The trade-off is that the concentricity is built in at the tooling stage, so it cannot be corrected on the machine. Care is still needed to keep the conductor or core running through the center of the tip; if the core scrapes the tip wall or enters under side load, the jacket can still come out eccentric.
Fixed-Center and Self-Centering Crossheads: Benefits and Limitations
A fixed-center (self-centering, adjustment-free) crosshead applies the same principle to a crosshead extrusion head: once the tip and die are fitted, production can start without a centering routine. The benefit is fast, repeatable setup and consistent concentricity from reel to reel.
The limitation is cost and precision. Because the concentricity depends entirely on how accurately the crosshead and tooling are machined and matched, the tolerances are tight and the tooling is more expensive. Adjustable crossheads remain more common because they are more forgiving on tooling cost, but they bring the operator back to the manual centering methods described above.
Traditional Die vs Fixed-Center Die vs Self-Centering Crosshead
| Aspect | Traditional die (separate tip and die) | Fixed-center (one-piece) die | Self-centering crosshead |
|---|---|---|---|
| Centering method | Manual, via centering bolts | Built into the tooling; no adjustment | Built into the head and tooling; no adjustment |
| Setup and changeover time | Longer; needs a centering routine each run | Short | Short |
| Trial/scrap material at setup | Higher | Lower | Lower |
| Tooling cost | Lower | Moderate | Higher (tight precision required) |
| Flexibility on the line | Can be re-centered to correct drift | Fixed; cannot be adjusted on the machine | Fixed; cannot be adjusted on the machine |
| Best suited to | Varied, short, or changing product mixes | Stable, repeated specifications | High-volume, repeatable production of the same spec |

When Should Manufacturers Use Self-Centering Tooling?
Self-centering and fixed-center tooling pays off when the same specification is run repeatedly and setup time and scrap are the dominant costs. Long, high-volume production of a stable jacket or insulation spec is where the fast, adjustment-free setup and consistent concentricity are most valuable, and where the higher tooling cost is spread across enough length to be worthwhile.
Traditional adjustable dies remain the better fit where the product mix changes often, where diameters and wall specs vary, or where the flexibility to re-center on the machine is more useful than the fastest possible setup. The two approaches are not competitors so much as tools for different production patterns, and many plants run both.
How Eccentricity Control Improves Fiber Optic Cable Quality
For fiber optic cable buyers, extrusion eccentricity is not just a production detail. It affects jacket uniformity, long-term mechanical protection, and batch-to-batch consistency, the same qualities that determine how a cable survives installation and years in the field. A supplier's ability to hold tight concentricity is a direct indicator of its process control.
In our own fiber optic cable manufacturing process, eccentricity is managed through a combination of stable extrusion conditions, in-line outer-diameter monitoring, and off-line wall-thickness measurement on ring samples at first-article approval and at set inspection intervals during the run. Jacket compounds behave differently during centering; transparent, black PE, and LSZH materials each read differently under light and by eye, which is one reason our choice of sheath materials such as PE, LSZH, and PVC is matched to both the application and the centering approach. Finished cables are then verified against dimensional and mechanical requirements as part of fiber optic cable testing.
Frequently Asked Questions
How do I check whether a cable jacket is eccentric?
Cut a clean ring sample, then measure the wall thickness at several points around the circumference. The difference between the thickest and thinnest points is the eccentricity. For transparent jackets, shining a light through the wall gives a quick visual read, but a measured sample is what confirms acceptance.
What causes eccentricity during extrusion?
The most common causes are off-center tooling, uneven melt flow around the die, and the core not running through the center of the tip because of side tension or a worn tip. Tooling wear and unstable temperature can both make a previously centered setup drift.
Does a fixed-center die completely eliminate eccentricity?
It removes the need to adjust the die, but it does not guarantee a concentric wall on its own. If the conductor or core is pulled off-center as it passes through the tip, the wall can still come out uneven. Core-path and tension control still matter.
Which centering method is best?
There is no single best method. Visual centering sets up the tooling, centering during extrusion does the fine work under load, in-line core centering suits small diameters, and light-assisted checking helps on transparent jackets. Touch-based checks are a supplementary aid only. In practice they are layered together, and every run is confirmed with measured samples.
Summary
Eccentricity control is about keeping the extruded wall concentric so that no side is dangerously thin and no material is quietly wasted. Traditional dies give operators the flexibility to correct centering on the machine, while fixed-center and self-centering tooling trade that flexibility for fast, repeatable setup and lower scrap on stable, high-volume specs. Choosing between them comes down to the production pattern, and holding either one within tolerance depends on disciplined measurement and stable process conditions.
If you are sourcing cable built to a specific wall and tolerance, Hengtong provides customized fiber optic cable solutions backed by the extrusion process control described above.