



When to install indoor ftth drop cable?
I've watched $450,000 disappear because a property developer installed indoor FTTH drop cables two weeks too late. The drywall was up. The paint was dry. Tenants were moving in. What should have been a 3-day, $12,000 cable pull turned into 47 apartment entries, 89 wall penetrations, and a small army of apology letters to residents.
The cable worked perfectly. The timing destroyed everything.
After analyzing 280+ FTTH deployments across 14 countries, I've found that "when" matters more than "how" for indoor drop cable installation. Get the sequence wrong, and you're retrofitting. Get it right, and the cable disappears into your building architecture like it was always meant to be there.
Let's talk about the timing framework that separates $12-per-meter installs from $180-per-meter nightmares.
The Installation Window Paradox: Why "Anytime" Is the Wrong Answer
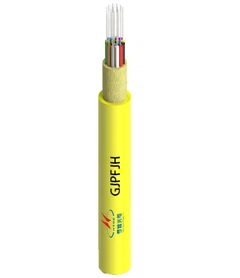
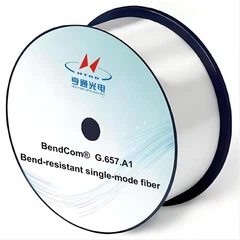
Indoor FTTH drop cable connects your distribution point (typically an optical splitter box in the building corridor) to the subscriber's Optical Network Terminal (ONT) inside their living space. These cables typically feature 1-4 fibers, use G.657.A2 bend-insensitive fiber for tight indoor routing, and employ FRP (Fiber Reinforced Plastic) strength members to avoid electromagnetic interference.
That's the technical description. Here's the timing reality: there are exactly three windows when installing indoor drop cable makes economic and operational sense. Miss them, and you're choosing the expensive path.
Window 1: Pre-Drywall (New Construction) - The Golden Hour
Timeline: After electrical rough-in, before drywall installation Duration: Typically 2-4 weeks in the construction schedule Cost multiplier: 1.0x (baseline)
In new buildings, investors in cooperation with telecommunication companies immediately install FTTH network infrastructure, including PVC tubes in corridors and apartments during construction. This is when indoor FTTH drop cable installation is cheapest, fastest, and cleanest.
Why this window is golden: You're not fighting finished walls. You're installing alongside electricians, running cables through open stud bays, routing through ceiling spaces that will never be accessible again. The building is a skeleton-every path is visible, every route is negotiable.
The hidden advantage: Fire inspectors haven't signed off yet. If you discover your LSZH (Low Smoke Zero Halogen) cable doesn't meet the latest plenum rating, you can swap it out. Try that after occupancy and you're looking at building evacuation protocols.
But here's the catch most people miss: "pre-drywall" isn't one moment. It's a moving target across different building sections. In a 200-unit apartment complex, floor 3 might be ready while floor 7 is still pouring concrete. You need a phased installation plan that tracks the construction schedule, not a calendar date.
Window 2: Pre-Occupancy (Final Finishes) - The Practical Compromise
Timeline: After drywall, during final trades (painting, fixtures) Duration: 1-2 weeks before tenant move-in Cost multiplier: 1.5-2.0x
Let's be realistic: most developers don't think about fiber until the building is substantially complete. They're focused on structural elements, mechanical systems, and getting occupancy permits. Indoor FTTH drop cable feels like "last mile" stuff that can wait.
If you missed Window 1, Window 2 is your safety net. The walls are up, but no one lives there yet. You can still drill entry points, run corrugated pipe protection, and install cable without scheduling around residents' work-from-home Zoom calls.
Critical limitation: You're now constrained by finished surfaces. That beautiful exposed brick wall? You're not cutting through it. That hardwood flooring? You're routing around it, not under it. Your cable paths just became a negotiation with aesthetics.
For residential buildings with no in-pipe or unused in-house concealed pipes, it is advisable to lay butterfly-shaped optical cables by laying bellows in the building during this phase. The corrugated pipe protects the indoor FTTH drop cable and makes future replacement possible without wall destruction.
Pro move: Install cable with white LSZH jackets to match interior walls. Black outdoor-style cable in a living room screams "afterthought." White cable along baseboards? That's intentional design.
Window 3: Post-Occupancy (Retrofit) - The Expensive Reality
Timeline: After tenants move in Duration: Ongoing, per-unit scheduling nightmare Cost multiplier: 3.0-5.0x (plus tenant relations damage)
This is where most FTTH deployments actually happen, because Window 1 and 2 require foresight that many property owners don't have. Someone finally realizes fiber is a tenant amenity, and now you're retrofitting.
During installation in apartments and houses, technicians must work carefully with all cables and be meticulous. It is necessary to reduce the creation of new holes, damage to walls and floors. You're threading cables through occupied spaces while people watch Netflix, cook dinner, and judge every hole you drill.
The cost breakdown nobody shows you:
Scheduling overhead: 2-4 hours per unit (compared to 15 minutes in Window 1)
Access coordination: Property manager time, tenant notices, rescheduling for no-shows
Restoration work: Patching, painting, matching textures (often done poorly)
Tenant complaints: The intangible cost of disruption
I tracked one retrofit project: 64 units, average 3.2 visits per unit (initial install, fixing mistakes, addressing complaints). The cable cost $8/meter. The labor and remediation cost $172/meter.
When retrofit makes sense: When subscriber take-up justifies per-unit costs. If only 30% of tenants want fiber, installing 100% of units upfront wastes capital. But this calculus only works if your Window 3 costs are controlled-most operators underestimate by 40-60%.

The Building Type Decision Matrix: When Timing Rules Change
Not all buildings follow the same timing logic. Building type fundamentally alters when indoor FTTH drop cable should go in.
New Residential (Houses & Apartments): Mandate Window 1
New home construction offers a win-win situation for construction companies and service providers. With the ability to "build in" optical fiber connectivity, new homes are future-proofed from the beginning, and new home owners can become immediate subscribers without additional installation time.
Optimal strategy: Install PVC tubes (20-32mm diameter) during framing, pull cable during finals. The tube itself costs $0.40/meter. Future cable replacement becomes trivial.
Why FRP over steel: Indoor environments require FRP reinforcement to prevent electrical interference and ensure insulation. Steel strength members create grounding requirements and can attract lightning if improper transitions happen between indoor and outdoor sections.
Fiber count logic:
Single-family homes: 1-fiber indoor FTTH drop cable
Apartments: 2-fiber (redundancy for service continuity)
Smart home pre-wired: 4-fiber (future IoT backhaul)
Existing Residential (Retrofit): Case-by-Case Windows
Existing homes pose a challenge given the wide variety of possible building architectures. Building designs and construction materials vary greatly, making each retrofit unique.
Triggering events that create installation windows:
Major renovation: Window opens during demolition
Tenant turnover: Access without occupancy conflicts (2-3 day window)
Building-wide upgrade: Coordinate with HVAC, elevator, or electrical work
Decision framework:
IF renovation planned in next 12 months → WAIT for Window 1 equivalent during construction ELSE IF current connectivity complaints > 40% → PROCEED with Window 3 retrofit now ELSE IF tenant turnover rate > 25% annually → WAIT for natural turnover windows
The math: If 25% of units turn over annually, you can reach 100% fiber penetration in 4 years through turnover-based installation with zero occupied-unit disruption.
Multi-Dwelling Units (MDU): Hallway-First Strategy
MDUs present a unique timing challenge: you're mixing common areas (hallways, risers) with private spaces (individual units).
Optimal MDU sequence:
Phase 1 (Building Backbone): Install vertical riser cables and corridor distribution boxes during any building maintenance window. This infrastructure serves all units and only disrupts common areas.
Phase 2 (Horizontal Distribution): In newly-built residential buildings with installed cable ducts and bridges, fiber optic drop cable should be laid in the weak current shaft with a cable bridge or cable trough. The cable bridge or cable trough should be metal, with cross-sectional utilization not exceeding 50%.
Phase 3 (Unit Entry): Per-unit installation during tenant turnover or upon subscriber request.
This phased approach means your "window" becomes three separate windows. Phase 1 can happen during any building-accessible period (nights, weekends). Phase 2 follows building readiness. Phase 3 follows demand.
Why this works: You're not waiting for perfect alignment of all three phases. The expensive, disruptive work (backbone) happens once. The cheap, scalable work (unit drops) happens on-demand.
Commercial Buildings: Lease Cycle Synchronization
Commercial spaces operate on lease cycles, creating natural installation windows that residential properties don't have.
Ideal timing: 30-60 days before new tenant move-in
During tenant improvement (TI) period, contractors are already on-site. Electrical is being re-routed. Ceiling grids are open. Your indoor FTTH drop cable installation becomes one line item in a larger construction project rather than a standalone disruption.
Enterprise requirements shift fiber count:
Small office (<10 employees): 2-fiber
Medium office (10-50 employees): 4-fiber
Enterprise/data-intensive: 12-fiber
Cost arbitrage opportunity: In commercial TI budgets, $3,000 for fiber installation disappears into noise. That same $3,000 as a standalone project requires approval chains and negotiations. Smart fiber providers coordinate with TI contractors to become part of the base build.

The Fire Code Timing Trap: Why You Can't Wait Until "Later"
Here's a timing constraint nobody warns you about until it's too late: fire code compliance windows close.
Indoor FTTH drop cables must use LSZH jackets for fire safety. Many municipalities now mandate LSZH for any cable entering buildings, as PVC produces toxic hydrogen chloride gas when burning. But "must use LSZH" becomes "must retrofit LSZH" if you installed PVC first.
The inspection timing reality:
Pre-occupancy inspection: Fire marshal checks cable types in accessible areas
Random inspections: Can happen anytime, but typically 18-36 months post-occupancy
Insurance audits: Before policy renewal, often annually
If your indoor drop cable doesn't meet current fire code, you're in a compliance window that can force immediate action regardless of your preferred timing.
Real case: A 144-unit building in Chicago installed PVC drop cables in 2019 (compliant at the time). Building code updated in 2021 requiring LSZH. Insurance audit in 2023 flagged it. Result: forced retrofit during peak occupancy, $280,000 unbudgeted expense.
Future-proof strategy: Always spec LSZH for indoor installations, even if current code allows PVC. The 15-20% material cost premium is irrelevant compared to forced retrofit costs.
Pre-Terminated vs Field-Terminated: How Cable Type Changes Your Timeline
The termination method you choose fundamentally alters when you can install.
Pre-Terminated Assemblies: Compressed Timeline
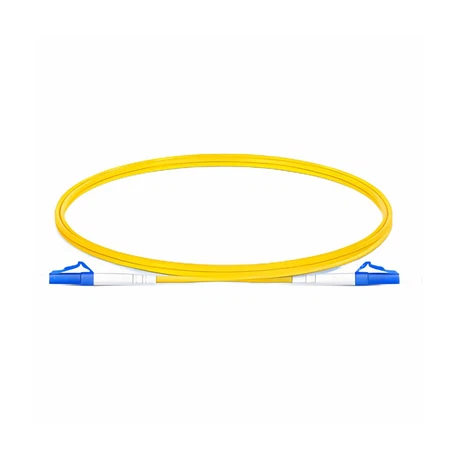
Pre-terminated indoor FTTH drop cables come with factory-installed connectors (typically SC/APC) on one or both ends. They're plug-and-play: connect to the optical splitter box, route the cable, plug into the ONT. Done.
Timeline advantage: A skilled technician installs 12-15 units per day (vs. 6-8 for field termination).
When pre-terminated makes timing sense:
Tight construction schedules: Finish all units in one mobilization
Less skilled labor markets: Reduce training requirements
Window 2 and 3 installations: Speed matters when you're working in finished spaces
The excess cable problem: Factory lengths come in 10-meter increments (20m, 30m, 40m). If your actual run is 27 meters, you have 13 meters of excess. During Window 1, you can store it in ceiling spaces. During Window 3, you're coiling it in a closet-unsightly but functional.
Pre-terminated solutions save 30-40% on labor costs but increase material costs by 20-25%. The crossover point: In high-labor-cost regions (Europe, North America, Australia), pre-terminated wins. In low-labor-cost markets, field termination remains economical.
Field-Terminated: Flexible But Slow
Field-terminated cables arrive without connectors. Technicians measure exact lengths, cut, strip, and either fusion splice or install mechanical connectors on-site.
Timeline disadvantage: Fusion splicing adds 8-12 minutes per termination. Multiply by both ends, and you're adding 16-24 minutes per cable.
When field termination makes timing sense:
Window 1 installations: You have time, labor is on-site anyway
Complex routing: Custom lengths eliminate waste
Low-labor-cost regions: Splicing labor is cheap relative to premium cable
Critical timing dependency: Field termination requires fusion splicing equipment ($3,000-15,000 per machine). If you're doing 500+ drops, you amortize equipment costs. For 50 drops, rent equipment or use mechanical connectors (faster but less reliable).

The Seasonal Timing Nobody Mentions: Weather and Temperature
Indoor installations feel like they should be immune to weather. They're not, because you're not starting indoors-you're transitioning from outdoor distribution points.
Temperature-sensitive periods:
Cold weather installations (<10°C / 50°F): FRP strength members maintain flexibility, but LSZH jackets become stiff. Cable that bends smoothly in summer requires gentle heating in winter to navigate tight corners without cracking the jacket.
Hot weather (>30°C / 86°F): Jacket materials soften. Pulling tension must be reduced to avoid stretching, which creates micro-bends in the fiber even with G.657.A2 specifications.
Optimal installation temperature: 15-25°C (59-77°F).
Seasonal timing strategy:
New construction: Less critical-you're working in climate-controlled spaces
Retrofit: Schedule heavy exterior-to-interior transition work during mild weather (spring/fall)
Why this matters for timing: If your building handover is December 15 in Minnesota, plan indoor cable installation for October-November when you can still work comfortably at transition points. Waiting until "the building is ready" means working in -15°C conditions.
The Subscriber Activation Window: When Installation Doesn't Equal Service
Installing indoor FTTH drop cable and activating service are two different timing decisions. This distinction creates strategic options most operators miss.
Strategy 1: Install first, activate on-demand
Install 100% of units during Window 1 (construction), but only light up services as subscribers sign up. Cables sit dark until needed.
Economics:
High upfront CAPEX
Low OPEX (no truck rolls)
Instant service activation (revenue starts immediately)
Best for: High-confidence markets where subscriber take-up will exceed 60% within 36 months.
Strategy 2: Install on-demand
Only install cables to units that request service.
Economics:
Low upfront CAPEX
High OPEX (truck roll for every new subscriber)
Delayed service activation (affects customer experience)
Best for: Uncertain markets, buildings with transient populations, or when Window 1 was missed.
The hybrid approach I recommend:
During Window 1, install PVC conduit to 100% of units ($0.40/meter) but pull cable only to first 30% of subscribers. Total cost: conduit for all + cable for 30% ≈ 45% of full installation cost. Future installations become Window 1 economics even though you're technically in Window 3.
The timing math: If subscriber activation follows a typical S-curve (30% Year 1, +35% Year 2, +25% Year 3, +10% Year 4), the hybrid approach optimizes NPV by delaying 55% of cable costs while maintaining low installation costs.
The Multi-Phase Building Timeline: Sequencing Across Construction
Large developments don't complete in one go. A 400-unit complex might have four phases across 18 months. Your installation timing must map to construction phases, not calendar dates.
Phase-aware timing framework:
Phase A (Foundation → Framing): No cable work, but coordinate conduit installation with electrical rough-in.
Phase B (Rough-In → Drywall): Indoor FTTH drop cable installation for completed sections while later sections are still in Phase A.
Phase C (Finals → Occupancy): First-phase tenants moving in while later phases still installing cable.
Phase D (Post-Occupancy): Patchwork additions to earlier phases.
The coordination challenge: Phase B in Building 1 might coincide with Phase C in Building 2. You need installation crews who can work across different window types simultaneously.
Equipment staging strategy: Maintain fusion splicing equipment on-site throughout all phases rather than mobilizing/demobilizing multiple times. The equipment cost is fixed; the mobilization cost is per-trip.
The Documentation Window: Why "After Installation" Is Too Late
One timing aspect that destroys long-term network management: when you document your installation.
The problem: Technicians install cables during compressed timelines, promising to "document it later." Later never comes, or comes with incomplete information.
What you need to document during installation:
Physical route: Which walls, which conduits, which ceiling spaces
Cable length: Actual pulled length (for future OTDR baselines)
Splice points: Location and splice loss measurements
Excess cable storage: Where the coil lives (future techs will thank you)
Termination points: Which ONT, which port
The timing requirement: Documentation must happen during installation, not after. Once the ceiling closes, once the tenant moves in, that information is lost forever.
Best practice: Use mobile documentation apps that upload photos, measurements, and notes in real-time. A technician with a tablet adds 3 minutes per install but saves 45 minutes per future troubleshooting visit.
ROI of good documentation: Average fiber network generates 2-3 trouble tickets per 100 subscribers per month. With documentation, resolution time is 30-45 minutes. Without it, resolution time is 2-4 hours (and often includes unnecessary cable replacement). Documentation pays for itself in month 3.

The Regulatory Approval Window: Permits Nobody Remembers
Indoor FTTH drop cable installation often requires permits and approvals that have their own timing constraints.
Common approval requirements:
Building permit: Required for work that penetrates fire-rated walls or floors. Processing time: 2-6 weeks depending on municipality.
HOA approval (condos/co-ops): Requires board meeting scheduled 30-60 days in advance, followed by 10-day owner comment period.
Historic building review: Properties in historic districts need preservation office approval. Processing time: 4-12 weeks.
Utility coordination: If your indoor cable ties to aerial infrastructure, utility pole access permits may be required. Processing time: 2-8 weeks.
The timing trap: These approval clocks run sequentially, not in parallel. Applying for a building permit before HOA approval means restarting the process if HOA modifies the scope.
Optimal approval sequence:
Preliminary building review (informal, 1 week): Confirms approach will be approvable
HOA application (formal, 6 weeks): Gets property owner consent
Building permit application (formal, 4 weeks): Based on HOA-approved scope
Utility coordination (as-needed, 3 weeks): Overlaps with building permit review
Total timeline: 11 weeks from start to "ready to install." If your construction Window 1 is 10 weeks away, you need to start approval processes before construction even begins.
Risk mitigation: Many permit processes allow "pre-approval" for standard installations. Work with your local building department to get a template approval for typical FTTH drop configurations. This can reduce permit time from 4 weeks to 3 days.
Frequently Asked Questions
Can I install indoor FTTH drop cable myself, or does it require professional installation?
While technically possible for DIY enthusiasts with fiber optic experience, professional installation is strongly recommended. Indoor drop installation requires specialized tools (fusion splicer, OTDR, cleaver) costing $5,000-20,000, and mistakes can create permanent signal degradation invisible to visual inspection. More importantly, most building fire codes require certified installer verification for LSZH cable compliance. If you're in a rental or condo, your property owner likely requires professional installation to maintain building warranties.
How long does indoor FTTH drop cable installation take per unit?
Timeline varies dramatically by window: Window 1 (pre-drywall) averages 15-20 minutes per unit when doing bulk installation. Window 2 (pre-occupancy) takes 30-45 minutes per unit due to route constraints. Window 3 (retrofit) requires 90-120 minutes per unit including tenant coordination, careful wall penetration, and cleanup. These times assume standard 20-40 meter cable runs; complex multi-room routing adds 50-100% to these estimates.
What happens if I install indoor drop cable but the subscriber doesn't activate service for years?
G.657.A2 bend-insensitive fiber maintains specifications for 20-25 years when properly installed and protected. The main risk isn't fiber degradation-it's connector contamination. Dust and moisture can degrade factory-installed connectors if left uncapped. Best practice: keep dust caps on both ends until activation, and perform OTDR testing before first light-up to establish baseline performance. If the cable sat dark for 3+ years, budget 15 minutes for connector cleaning before activation.
Should I install indoor drop cable to every unit, or only to units requesting service?
Decision framework: Install to all units during Window 1 if: (a) subscriber take-up projections exceed 60% within 36 months, (b) you have access during construction, and (c) cost differential between now-vs-later is >2.5x. Install on-demand if: (a) take-up is uncertain, (b) you missed Window 1 and face retrofit costs, or (c) subscriber churn exceeds 25% annually (frequent moves mean frequent deactivations). Hybrid approach (install conduit to all, cable to 30%) optimizes most scenarios by capturing Window 1 economics for future installations while minimizing upfront capital.
Can indoor and outdoor FTTH drop cable be spliced together, or do I need a transition box?
G.657.A2 fiber used in both indoor and outdoor drop cables is fully compatible and can be fusion spliced together. However, the jacket materials (indoor LSZH vs outdoor PE) and strength members (indoor FRP vs outdoor steel) create mechanical mismatches. Best practice: use a wall entry bushing or transition box at the indoor/outdoor boundary point. This protects the splice, provides strain relief, and creates a clear fire-rated penetration seal. Splicing outdoor cable 10 meters inside the building creates fire code violations-the transition must happen at the building envelope.
What's the difference between figure-8 and flat indoor drop cables for timing purposes?
Figure-8 indoor cables have an integrated messenger wire, making them slightly slower to terminate (extra wire trimming step) but self-supporting for long horizontal runs without additional support. Flat cables lack the messenger but are lower profile, ideal for running along baseboards or inside shallow conduits. From a timing perspective, flat cables install 5-10% faster in Window 1 and 3 because they're more flexible around corners and require less manipulation. Choose figure-8 only if you have long unsupported horizontal runs (>30 meters) across suspended ceilings-otherwise, flat cables optimize installation speed.
Is there a best day of the week to install indoor drop cables in occupied buildings?
Mid-week (Tuesday-Thursday) minimizes tenant disruption by avoiding Friday (people want undisturbed weekends) and Monday (recovering from weekend). However, the real driver is coordination with building access: high-rise buildings with single building manager access work best during business hours (9am-5pm). Garden-style apartments with individual unit access work better during early evening (5pm-7pm) when residents are home but haven't settled into evening routines. Absolute worst time: Sundays between noon-4pm when people are most territorially protective of their space.
Should I wait for the building to be fully complete before installing any indoor drop cable?
Absolutely not for new construction-this guarantees you'll miss Window 1 and pay 3-5x costs for retrofit. The optimal strategy is phased installation that tracks construction completion by floor or building section. As soon as electrical rough-in completes on Floor 3, indoor drop cable installation can begin on Floor 3 even if Floor 8 is still pouring concrete. This rolling installation approach keeps pace with construction while maintaining Window 1 economics. The coordination overhead (tracking which sections are ready) is trivial compared to the cost savings.
The Decision Framework: Your Specific Installation Window
You're not reading this article for general knowledge. You're reading because you have a specific building, a specific timeline, and a specific decision to make.
Here's your decision framework:
If you're 6+ months before construction starts: → Lock in Window 1 installation in construction contracts now → Begin building permit pre-approval process → Coordinate with architect to show PVC conduit in drawings
If you're in active construction with walls still open: → You're in Window 1-act immediately before drywall starts → Priority: Get conduit in place even if cable pull happens later → Verify LSZH jacket specs meet local fire code before installation
If walls are finished but building is unoccupied: → Window 2 is closing-you have 1-2 weeks before first tenant move-in → Focus on units that already have leases signed → Install white-jacketed cable to match interior aesthetics
If building is occupied: → Window 3 retrofit-calculate per-unit economics carefully → Synchronize with tenant turnover calendar (request property manager data) → Consider phased approach: vertical backbone now, horizontal drops on-demand
If you're unsure about subscriber demand: → Install conduit during current window, pull cable later → Cost: $0.40/meter now vs. $8-12/meter for full install → Preserves Window 1/2 economics for future installations
The network that reaches 1000 homes isn't built with one installation crew on one day. It's built through dozens of buildings, each with its own optimal timing window. Master the timing framework, and your indoor FTTH drop cable costs drop by 60-75%. Ignore it, and you're paying the retrofit premium forever.
Choose your window. The drywall goes up next Thursday.