



FTTH Drop Cable Installation Guide
You want to set up high-speed internet at home, but the thought of handling FTTH drop cable installation feels overwhelming. We get it-many homeowners face this. In this guide, we focus on residential setups and compare it to old copper lines. We address key worries like complex steps, picking the right supplier, and if your team can maintain it. FTTH drop cable installation brings fiber straight to your door for faster speeds. We walk you through it step by step.
FTTH stands for Fiber to the Home. It uses thin glass fibers to carry data as light pulses. This beats copper cables in speed and reliability. Drop cables connect the main network to your house. They handle the last stretch, often from a pole or underground to your wall box.
Why choose FTTH? It supports streaming, gaming, and work from home without lag. Market data shows growth- the FTTH drop cable market hit USD 3.2 billion in 2024 and grows at 10.6% CAGR from 2026 to 2033. In residential areas, it cuts downtime compared to copper. But installation needs care to avoid issues.
We cover basics first, then steps. Expect tools like strippers and splicers. If you're new, start with pros, but this helps you understand or DIY small parts. Let's dive in.

What Is FTTH Drop Cable and Why Install It?
FTTH drop cable runs from the street to your home. It carries light signals for internet. Unlike copper, fiber handles more data without loss over distance. In homes, this means gigabit speeds.
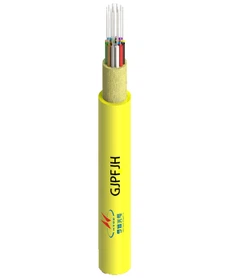
Drop cables come in types like flat or round. Flat ones suit aerial installs; round work underground. They have protective jackets against weather. For residential use, pick ones rated for outdoor to indoor transition.
Installation solves slow internet pain. Copper limits to 100 Mbps often, but FTTH hits 1 Gbps or more. It future-proofs your setup as demands grow.
Key parts include the cable, connectors, and wall box. The box mounts inside and connects to your router. Suppliers like major telecoms offer these.
Worried about complexity? Many steps are straightforward with right tools. But select suppliers carefully-check reviews for reliability. Maintenance is simple; most issues come from poor initial setup.
Compare to copper: Fiber resists interference, lasts longer. Copper degrades with electromagnetic noise; fiber doesn't. In homes, FTTH boosts property value too.
Data from reports: FTTH deployments rose 12% in 2024 globally. For you, this means better access.
Understand bends-fiber can't curve sharply. Minimum radius is 10 times diameter. Ignore this, and signals weaken.
Safety matters. Wear gloves; fibers can splinter. Use eye protection near lasers.
In residential focused installs, plan around home layout. Avoid walls with pipes. This prevents future headaches.
If your team handles maintenance, train on basics like cleaning connectors. No need for experts daily.
We see why FTTH wins over traditional setups. Next, the steps.
Step 1: Plan and Prepare for Installation
Start with planning. Survey your site. Check from pole or underground point to house entry. Measure distance-drop cables come in standard lengths like 50-300 meters.
Gather tools. You need a fiber stripper, cleaver, fusion splicer if splicing, cable cutter, and flashlight. For residential, add ladder for aerial or shovel for bury.
Choose cable type. For homes, flat drop suits poles; toneable for underground to locate later.
Address pain points: If install seems complex, break it into tasks. Pick supplier with good support-avoid cheap ones that fail early.
Safety first. Turn off power near work area. Mark utilities to avoid digging into lines.
Prepare materials: Connectors, splice protectors, wall box (ONT), and ties.
In comparison, copper install skips splicing but limits speed. FTTH needs precision but pays off.
Document plan. Sketch route, note obstacles like trees.
If team maintains, include them in planning. This builds confidence.
Time it: Prep takes 1-2 hours. Do this right, and rest flows.
Common error: Skipping survey leads to wrong length. Fix by measuring twice.
For residential, consider permits if crossing public areas.
Now, you're set for routing.
Step 2: Route the Cable Safely
Route from network point to home. For aerial, attach to pole with clamps. Use messenger wire if cable lacks support.
Keep tension even. Pull gently-excess force damages fibers.
For underground, dig trench 12-18 inches deep. Lay conduit first for protection.
In homes, enter through wall hole. Seal it against moisture.
Bends matter. Stick to 20-30 times diameter radius, as guidelines say.
Tools help: Use slitter for jacket removal if needed.
Compare to copper: Fiber routes similar but needs more care against kinks.
If complex, hire pros for this step. But you can manage short runs.
Maintenance tip: Label route for future access.
Avoid common mistake: Tight bends cause signal loss. Test curves with tool.
In residential, route along eaves to hide.
Secure with clips every 1-2 meters.
This step takes 2-4 hours depending on length.
Transition indoors carefully. Use grommet in wall.
Now, connect it.

Step 3: Splice and Connect the Cable
Splice if needed. Strip jacket with stripper-remove 2-3 inches.
Clean fibers with alcohol. Cleave ends straight.
Use fusion splicer: Align and fuse. Cover with protector sleeve.
Connect to ONT box. Mount box inside, near power.
Plug connector-SC or LC type common.
For pre-terminated cables, just plug in.
Address supplier choice: Good ones provide compatible connectors.
In FTTH vs copper, splicing beats soldering for reliability.
Team maintenance: Learn cleaning to avoid dust issues.
Test connection visually first.
Common error: Dirty ends cause poor signal. Always clean.
In homes, place box in utility room.
This step: 1-2 hours with practice.
Activate next.
Step 4: Test and Activate the Setup
Test with OTDR or power meter. Check for loss-should be under 0.5 dB per splice.
Activate: Connect to modem, power on.
Run speed test. Expect full rated speed.
Document readings for maintenance.
If issues, recheck splices.
Pain point: Maintenance-clean connectors monthly.
Compared to copper, FTTH tests show less attenuation.
Tools: Borrow tester if not owning.
Common mistake: Skipping test leads to later faults.
In residential, involve family in final check.
This wraps core steps.
Real-World Applications and Tips
Apply this in your home. For example, in a telecom project in a city, a large operator installed FTTH drop cables for 500 homes. They faced urban clutter but used aerial flat drops. Result: 98% uptime, speeds up 300% from copper. They picked supplier with weather-proof cables.
In rural areas, same operator buried cables, adding toneable feature for locates. Cut install time 20%.
Data backs it: FTTH market grows as homes demand better connectivity.
Tools recommendation: Three key ones-Miller ROC Stripper for precise stripping, Jonard Fiber Slitter for jackets, and Jameson Fiber Driver for pushing cables fast.
Compare FTTH to copper in table:
| Dimension | FTTH Drop Cable | Traditional Copper |
|---|---|---|
| Speed | Up to 10 Gbps | Up to 100 Mbps |
| Distance | Longer without loss | Degrades quickly |
| Reliability | High, no interference | Prone to noise |
| Cost Long-Term | Lower maintenance | Higher over time |
| Installation Complexity | Moderate with tools | Simpler but limited |
Use this for decisions.
For maintenance, check connections quarterly. If team unsure, outsource checks.
In high-density homes, group installs save costs.
Case shows: Proper planning cuts errors.
Apply steps with your layout.
FAQ
What tools do I need for FTTH drop cable installation?
You need basics like stripper, cleaver, splicer, cutter. Add slitter and tester. Costs start at $200 for kit.
How long does FTTH drop cable installation take?
It takes 4-8 hours for a home. Prep 1 hour, routing 2-3, splicing 1, test 1. Pros do faster.
What is the cost of FTTH drop cable installation?
Expect $500-1500 per home. Cable $1-2 per meter, labor $300-800. Varies by length and type.
What are common mistakes in FTTH drop cable installation?
Tight bends, dirty connectors, wrong cable type. Avoid by following radius rules and cleaning.
Is FTTH drop cable installation safe for DIY?
Yes for simple parts, but hire for splicing if new. Wear safety gear.
How to choose a supplier for FTTH drop cable?
Look for certified ones with warranties. Check reviews, avoid low-price traps.
Can my team maintain FTTH after installation?
Yes, with training on cleaning and basic tests. No daily expert needed.
What if installation goes wrong?
Retest splices, check bends. Call supplier support.
Wrap Up and Get Started
You've got the guide for FTTH drop cable installation. Follow steps, use tools, and address pains like complexity. In homes, it transforms connectivity. Compare to copper-FTTH wins for speed. With market growing, now's time. Grab tools, plan your route, and install. If stuck, consult pros. Your fast internet awaits.