

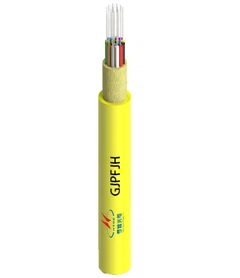


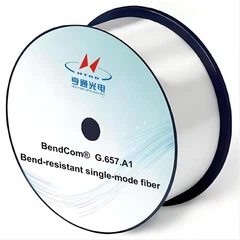
Fiber optic cables leverage pulses of light traveling through ultra-thin glass or plastic fibers to deliver data at remarkable speeds, far surpassing traditional copper wiring in bandwidth, transmission range, and overall performance. Widely deployed across internet infrastructure, telecom networks, and enterprise-grade connectivity solutions, they remain inherently resistant to electromagnetic interference (EMI), ensuring stable, high-throughput communication with minimal signal degradation and exceptionally low latency.
Fiber optic cables are highly durable, but they can still suffer damage from bending, crushing, or environmental factors. Whether you're dealing with a broken fiber in a data center or a damaged home internet line, proper repair techniques are crucial to restore signal integrity.
Common Causes of Fiber Optic Cable Damage
Dig Cuts
Excavation equipment accidentally severing cables is the single most common cause of fiber breaks in outside plant (OSP) networks. Despite "call-before-you-dig" programs, construction crews still routinely cut through buried fiber lines. The result is usually a complete cable break that requires emergency fusion splicing or full-segment replacement.
Rodent Damage
Rodents-squirrels, rats, and gophers-chew through cable jackets and into the fiber core, especially on aerial and direct-buried installations. Armored cables reinforced with steel wire or fiberglass reduce the risk but do not eliminate it entirely. In underground conduit, insect damage is also a concern in tropical and subtropical regions.
Excessive Bending
Every fiber optic cable has a specified minimum bend radius. Exceeding that radius causes two distinct types of loss:
Macrobends - visible curves where light escapes the fiber core. Macrobends are common in tightly routed patch panels, cable trays, and splice enclosures. Severe bends cause a sharp increase in insertion loss or complete signal failure.
Microbends - tiny deformations caused by lateral pressure, rough conduit surfaces, or improper clamping. Individual microbends are small, but they accumulate over long cable runs.
Both conditions are preventable with proper cable management and routing hardware.
Environmental Factors
Water Ingress: Moisture enters through jacket cracks or failed seals. Under freezing conditions, expansion crushes the internal fibers. Gel-filled and dry-block designs provide moisture protection but degrade over time.
Thermal Cycling: Repeated expansion and contraction of jackets and buffer coatings create microbend stress, particularly in rooftop, desert, and polar deployments.
UV Degradation: Ultraviolet radiation embrittles polymer jackets over time, leading to cracking. This primarily affects aerial cables that lack UV-rated jacketing.
Improper Installation
Exceeding the rated tensile load during cable pulling, violating the minimum bend radius while routing, and failing to secure the cable at transition points-these mistakes create hidden stress cracks and microbends that cause gradual signal attenuation, sometimes undetectable until weeks after installation.
Connector Contamination
A single dust particle on a connector end face can produce measurable signal loss or back reflection. Common contaminants include dust, fingerprint oils, cleaning-solvent residue, and outgassing particles from adapters. Best practice is to inspect and clean every connector with an IPA-moistened lint-free wipe or a one-click cleaner before each mating.
Here's a comprehensive guide to repairing fiber optic cables effectively.
1. Tools & Materials Needed
Before starting, gather the necessary equipment:
Fiber optic cleaver – For making clean cuts on the fiber.
Fusion splicer or mechanical splice connectors – To join fibers.
Fiber stripper – Removes protective coatings.
Visual Fault Locator (VFL) – Helps identify breaks.
Alcohol wipes & lint-free cloth – For cleaning connectors.
Heat shrink tubing or splice protector – Secures the repaired section.
2. Step-by-Step Repair Process
Step 1: Identify the Damage
Use a Visual Fault Locator (VFL) to pinpoint breaks (red light will leak at damaged spots).
Inspect for visible cracks, bends, or crushed sections.
Step 2: Cut Out the Damaged Section
Strip the protective jacket using a fiber stripper.
Carefully cleave the fiber at both ends of the damaged section to ensure smooth, perpendicular cuts.
Step 3: Clean & Prepare the Fiber Ends
Wipe the exposed fiber with alcohol wipes to remove contaminants.
Avoid touching the bare glass core to prevent signal loss.
Step 4: Splice the Fiber
Option A: Fusion Splicing (Most Reliable)
Place the two fiber ends into the fusion splicer.
The machine aligns and melts the fibers together using an electric arc.
Protect the splice with heat shrink tubing.
Option B: Mechanical Splicing (Temporary Fix)
Insert the fiber ends into a mechanical splice connector.
Lock the connector to hold fibers in place (higher loss than fusion splicing).
Step 5: Test the Repair
Use an Optical Power Meter (OPM) to check signal loss.
Acceptable loss: < 0.5 dB for fusion splicing, < 0.3 dB for connectors.
If loss is too high, re-clean or re-splice.
3. Common Mistakes to Avoid
Skipping cleaning – Dust causes signal degradation.
Poor cleaving – Angled cuts lead to high-loss splices.
Over-tightening cable ties – Can create microbends.
4. When to Call a Professional
Long-haul or buried cables – Require specialized equipment.
Multiple fiber breaks – Complex repairs need expertise.
No splicing tools available – Temporary fixes may fail.
5. Preventive Maintenance Tips
✔ Avoid sharp bends (minimum bend radius = 5 cm).
✔ Use protective conduits in harsh environments.
✔ Inspect connectors regularly for dirt or damage.
How to Troubleshoot a Fiber Optic Cable Before Repair
A loss of connectivity does not always mean the fiber optic cable itself is broken. Dirty connectors, a damaged patch cord, excessive bending, a poor splice, or a problem with the connected equipment can produce similar symptoms. Before cutting into an installed cable, confirm that the fault is actually in the fiber and determine where it is located.
Different fiber test tools answer different questions:
| Tool | What It Checks | When It Is Most Useful |
|---|---|---|
| Fiber Inspection Microscope | Connector contamination or physical end-face damage | Before cleaning or reconnecting accessible connectors |
| Visual Fault Locator (VFL) | Visible light leakage from breaks, tight bends, or poor connections | Short, accessible fiber links |
| Optical Power Meter (OPM) | Received optical power or overall link loss | Checking whether the complete link is operating within its required optical budget |
| OTDR | Breaks, splices, connectors, and high-loss events along the fiber | Long, buried, aerial, campus, backbone, or otherwise inaccessible links |
For an accessible indoor connection, start with the simplest possibilities. Inspect the connector end faces and check the patch cord before assuming that the installed cable has failed. Replacing a damaged short patch lead is usually faster and more reliable than attempting to splice it.
When a fiber cut is suspected but the fault is not visible, technicians commonly use an OTDR to estimate the distance to the event. This is especially useful for underground, aerial, telecom, and campus networks. However, the OTDR reading is a distance along the fiber, not necessarily the exact physical location on a cable route. Route drawings, known splice locations, handholes, poles, and previous OTDR traces can help narrow down the actual repair point.
Safety note: Never look directly into the end of an optical fiber to check whether it is carrying a signal. Fiber links may transmit invisible optical energy. Use appropriate test equipment and follow the network operator's safety procedures.
Can Every Fiber Optic Cable Be Repaired?
Many localized types of fiber optic cable damage can be repaired, but splicing is not always the best solution. The correct approach depends on what has been damaged, how much of the cable is affected, and whether the cable is a removable patch cord or part of a permanently installed network.
A clean, localized cut in an otherwise sound installed cable can often be restored by fusion splicing. Damage that extends over a longer section may require the affected cable to be removed and replaced rather than simply joining the two visible ends.
Short factory-terminated patch cords should be treated differently. Because they are relatively easy to replace, installing a new compatible patch cord is usually more practical than introducing a splice into the middle of the assembly.
| Damage Type | Typical Repair Approach |
|---|---|
| Dirty connector | Inspect, clean if required, reconnect, and retest |
| Physically damaged connector | Re-terminate or replace the connectorized cable where appropriate |
| Broken short patch cord | Replace the complete patch cord |
| Localized cut in an installed cable | Fusion splice the sound fiber ends |
| Crushed or heavily deformed cable | Remove the affected section and install sound replacement cable |
| Multiple broken fibers | Identify and splice the affected fibers, then protect them inside a splice enclosure |
| Damage extending over a long section | Replace the affected cable section rather than repairing only the visible break |
| Damaged ISP or FTTH drop cable | Contact the network operator or a qualified fiber technician |
Repair or Replace?
Splicing is generally most appropriate when a permanent backbone, underground, aerial, or other installed fiber cable has suffered a localized break and replacing the complete cable route would be impractical.
Replacement should be considered when:
- the damaged cable is a short removable patch cord;
- several areas of the cable are damaged;
- the jacket, strength members, and internal fibers have been badly crushed or stretched;
- environmental damage extends beyond a single repair point;
- there is not enough sound cable remaining to make a reliable repair;
- the original cable no longer meets the required network specification.
The objective is not simply to make light pass through the fiber again. A permanent repair should restore optical performance while protecting the repaired fibers from bending, moisture, mechanical stress, and future damage.
How Long Does It Take to Repair a Fiber Optic Cable?
There is no single repair time that applies to every fiber cut. The actual fusion splice can be completed relatively quickly, but fiber splicing time and total fiber repair time are not the same thing.
A complete restoration may include locating the fault, reaching the damaged cable, identifying the affected fibers, preparing the cable, making the splices, organizing and protecting the repaired fibers, sealing the enclosure, testing the link, and documenting the repair.
A more useful way to estimate repair time is to look at the type of fault:
| Repair Situation | Practical Time Scale | Main Factors |
|---|---|---|
| Dirty connector or loose connection | Often a minutes-scale task once identified | Inspection, cleaning, reconnection, and testing |
| Damaged short patch cord | Often a minutes-scale task when a compatible spare is available | Fault confirmation and replacement |
| Accessible localized cable break | Generally an hours-scale restoration | Cable preparation, splicing, protection, and testing |
| Underground or difficult-to-access fiber cut | May require many hours or longer | Fault location, excavation or duct access, cable slack, and site conditions |
| High-fiber-count cable damage | May require many hours or longer | Number of affected fibers, identification, splicing, tray work, and verification |
| Damage requiring a replacement cable section | Longer than a single-point repair | Two splice locations, additional cable preparation, and testing |
These are planning scales rather than service guarantees. Two similar fiber cuts can require very different restoration times depending on where they occur.
What Has the Greatest Effect on Fiber Repair Time?
Fault location.
When the break is not visible, technicians may need OTDR testing and cable-route records before field work can begin.
Cable access.
An exposed indoor fiber is easier to reach than a cable inside a duct, manhole, underground route, or aerial installation. In some cases, gaining safe access to the cable takes longer than the optical repair itself.
Number of affected fibers.
Restoring a single fiber is very different from repairing a cable containing dozens or hundreds of active fibers. High-fiber-count repairs require additional identification, splicing, tray organization, and testing.
Extent of damage.
A clean localized cut is usually simpler to restore than a cable that has been crushed, stretched, burned, or damaged along a longer section. If the affected length has to be replaced, technicians may need to create two splice locations instead of one.
Available cable slack.
If enough sound cable is available on both sides of the fault, the ends may be brought together in one splice location. Without sufficient slack, a compatible replacement section may have to be installed between them.
Testing requirements.
After the repair, technicians may perform end-to-end optical loss measurements, received-power checks, OTDR testing, or other acceptance tests depending on the network requirements. Critical networks may also require updated splice and test records before the repair is considered complete.
Temporary Restoration vs. Permanent Repair
During an emergency fiber cut, restoring network service may be the first priority. Depending on the network design, technicians may temporarily restore connectivity by moving traffic to a spare fiber, rerouting services, installing a temporary bypass cable, or making an emergency splice.
A temporary restoration does not always complete the physical repair.
A permanent fiber optic cable repair may still require:
- removing damaged cable;
- installing a compatible replacement section;
- completing permanent fusion splices;
- installing or rebuilding a splice closure;
- organizing and protecting repaired fibers;
- restoring environmental seals and mechanical protection;
- completing final optical testing;
- updating cable routes, splice locations, and test records.
For critical fiber networks, accurate route drawings, splice records, spare-fiber assignments, service loops, and previous test results can reduce future restoration time.
This is why the answer to "how long does it take to repair a fiber optic cable?" depends less on the fusion cycle itself and more on fault location, cable access, damage extent, fiber count, available slack, and the level of testing required before the network can return to normal service.
Conclusion
Repairing fiber optic cables requires precision, but with the right tools (cleaver, splicer, VFL), you can restore connections efficiently. Fusion splicing offers the best performance, while mechanical splices work for quick fixes. Always test after repairs and consider professional help for critical networks.
FAQ
Q: Can a broken fiber optic cable be repaired?
A: Yes. The standard procedure is to locate the break with an optical time-domain reflectometer (OTDR), expose the damaged section, and rejoin the fibers by fusion splicing or mechanical splicing. Clean breaks can be spliced directly. Crushed or severely damaged sections require cutting out the affected segment and splicing in new cable on both ends.
Q: How long does it take to repair a fiber optic cable?
A: A single-fiber splice takes 5–10 minutes. A complete outdoor cable repair-including fault location, field work (excavation or aerial access), fiber preparation, splicing, OTDR verification, and enclosure sealing-typically takes 2–8 hours. High-count cables (48-fiber, 96-fiber, and above) can take a full day or longer.
Q: What is the difference between fusion splicing and mechanical splicing?
A: Fusion splicing uses an electric arc to permanently fuse the ends of two fibers together-typical insertion loss is less than 0.1 dB, and it requires a fusion splicer. Mechanical splicing holds the fibers in an alignment fixture with index-matching gel; insertion loss is 0.2–0.5 dB, equipment cost is lower, and it is well suited for temporary repairs.
Q: How can I tell if my fiber optic cable is damaged?
A: Symptoms include complete loss of connectivity, intermittent dropouts, rising bit-error rates, and reduced throughput. An OTDR can pinpoint the exact location and type of fault along the fiber path. A visual fault locator (VFL) injects visible red laser light into the fiber and can detect breaks and macrobends over short distances.
Q: Can you splice fiber without a fusion splicer?
A: Yes-use a mechanical splice. A mechanical splice joins two cleaved fibers in an alignment fixture filled with index-matching gel. Loss is higher (0.2–0.5 dB versus less than 0.1 dB for fusion), but it is a standard, widely accepted method for emergency repairs, temporary fixes, and low-fiber-count installations.