



Installing aerial fibre optic cable on a building can seem like a daunting task, but with the right knowledge and tools, it can be a smooth process. As an aerial fibre optic cable supplier, I've seen firsthand the importance of a proper installation. In this blog, I'll walk you through the steps of installing aerial fibre optic cable on a building, from planning to the final connection.
Planning the Installation
Before you start any installation, it's crucial to have a solid plan in place. This involves several key steps:
Site Survey
First off, you need to conduct a thorough site survey. This means checking out the building's layout, the surrounding environment, and any potential obstacles. Look for things like trees, power lines, and other structures that could interfere with the cable installation. You also need to consider the distance the cable will need to cover and the best route for it to take.
Cable Selection
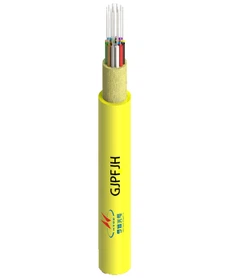
Choosing the right cable is essential. There are different types of aerial fibre optic cables available, each with its own features and benefits. For example, the Figure 8 Aerial Cable is a popular choice. It has a unique figure-8 shape that helps with easy installation and provides good protection for the fibres. Another option is the Figure 8 fiber cable, which is non-metallic and suitable for areas where there are concerns about electrical interference. And if you need a cable with high strength and durability, the Multi Tube Single Jacket ADSS Cable might be the way to go.
Permits and Regulations
Don't forget about the legal stuff. You'll likely need to obtain the necessary permits from the local authorities before you start the installation. Make sure you're familiar with all the relevant regulations regarding aerial cable installation, such as safety standards and right-of-way rules.
Gathering the Tools and Equipment
Once you have your plan in place, it's time to gather the tools and equipment you'll need. Here are some of the essentials:
- Ladders and Aerial Lifts: Depending on the height of the building, you'll need either ladders or aerial lifts to reach the installation points.
- Cable Pulling Equipment: This includes cable pullers, winches, and ropes to help you pull the cable into place.
- Splicing Tools: You'll need tools for splicing the fibre optic cables together, such as fusion splicers and cleavers.
- Testing Equipment: To ensure the cable is working properly, you'll need testing equipment like optical time-domain reflectometers (OTDRs) and light sources.
Preparing the Building
Before you start installing the cable, you need to prepare the building. Here's what you need to do:
Mounting Brackets
Install mounting brackets on the building where the cable will be attached. These brackets should be sturdy and securely fastened to the building structure. Make sure they're positioned at the right height and spacing to support the cable.
Grounding
Proper grounding is crucial for the safety of the cable and the people working on it. Install grounding rods and connect them to the cable's metallic components to prevent electrical hazards.
Installing the Cable
Now comes the main part - installing the cable. Here's a step-by-step guide:
Cable Deployment
Start by deploying the cable from the cable reel. Use the cable pulling equipment to carefully pull the cable along the planned route. Make sure the cable is not kinked or damaged during the pulling process.
Attaching the Cable
Once the cable is in place, attach it to the mounting brackets using cable clamps or ties. Make sure the cable is securely fastened and has some slack to allow for expansion and contraction due to temperature changes.
Splicing the Cables
If you need to splice multiple cable segments together, use the splicing tools to make the connections. This is a delicate process that requires precision and skill. Make sure the splices are properly protected to prevent moisture and other contaminants from entering.
Testing the Cable
After the cable is installed and spliced, it's time to test it. Use the testing equipment to check the cable's performance, such as its attenuation and bandwidth. Make any necessary adjustments or repairs if the test results are not satisfactory.


Finalizing the Installation
Once the cable is installed and tested, there are a few final steps to complete:
Cable Protection
Install cable protectors along the route to prevent damage from animals, weather, and other external factors. These protectors can be made of materials like PVC or metal.
Documentation
Keep detailed documentation of the installation, including the cable route, splice locations, and test results. This documentation will be useful for future maintenance and troubleshooting.
Maintenance and Troubleshooting
After the installation is complete, it's important to perform regular maintenance on the cable to ensure its long-term performance. Here are some tips:
- Inspect the Cable Regularly: Check the cable for any signs of damage, such as cuts, abrasions, or loose connections.
- Clean the Cable: Remove any dirt, debris, or moisture from the cable to prevent corrosion and other problems.
- Troubleshoot Problems: If you encounter any issues with the cable, such as signal loss or intermittent connectivity, use the testing equipment to identify the problem and make the necessary repairs.
Contact for Procurement
If you're interested in purchasing aerial fibre optic cables or need more information about installation services, feel free to reach out. We're here to help you find the right solutions for your needs. Whether you're a small business or a large corporation, we have the expertise and products to meet your requirements.
References
- Fiber Optic Association. (2023). Fiber Optic Installation Handbook.
- Telecommunications Industry Association. (2023). Standards for Aerial Fiber Optic Cable Installation.