

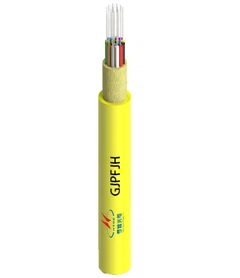


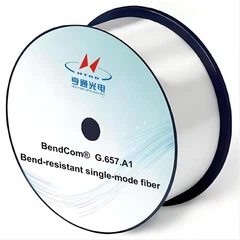
Hey there! As a supplier of fiber optic cable assemblies, I often get asked about the installation tools required for these assemblies. In this blog post, I'll share some of the essential tools you'll need to ensure a smooth and successful installation of fiber optic cable assemblies.
1. Fiber Optic Cutter
A fiber optic cutter is a must - have tool for any fiber optic installation. It's used to make a clean and precise cut on the fiber optic cable. When the fiber is cut correctly, it minimizes signal loss and ensures a proper connection. A good fiber optic cutter should be able to cut the fiber at a 90 - degree angle, which is crucial for optimal performance. You can find different types of fiber optic cutters on the market, from basic manual ones to more advanced automatic models.
2. Fusion Splicer
Fusion splicing is a technique used to join two fiber optic cables together permanently. A fusion splicer is the tool that makes this happen. It uses an electric arc to melt the two fiber ends and then fuses them together. This creates a very low - loss connection. When choosing a fusion splicer, consider factors like splicing time, splice loss, and the type of fibers it can handle. It's an investment, but it's well worth it for professional - grade installations.
3. Cleaver
A cleaver is similar to a cutter but is often used for preparing the fiber end before splicing or terminating. It creates a smooth, flat surface on the fiber, which is essential for a good connection. There are different types of cleavers available, such as mechanical cleavers and laser cleavers. Mechanical cleavers are more common and affordable, while laser cleavers offer higher precision.
4. Fiber Optic Strippers
Fiber optic strippers are used to remove the outer jacket, buffer, and coating from the fiber optic cable. This exposes the bare fiber, which can then be spliced or terminated. You need to be careful when using strippers to avoid damaging the fiber. There are different strippers for different types of fiber cables, so make sure you choose the right one for your specific application.
5. OTDR (Optical Time - Domain Reflectometer)
An OTDR is a powerful testing tool used to measure the length of a fiber optic cable, detect faults, and measure signal loss. It sends a light pulse into the fiber and measures the reflected light. By analyzing the time it takes for the light to return and the intensity of the reflection, you can get detailed information about the fiber's condition. This is especially important for long - distance fiber optic installations.
6. Fiber Optic Inspection Scope
A fiber optic inspection scope is used to visually inspect the fiber end faces. It can detect dirt, scratches, or other contaminants that could affect the performance of the fiber optic connection. By using an inspection scope, you can ensure that the fiber ends are clean and in good condition before making a connection. You can find handheld inspection scopes that are easy to use and portable.


7. Crimping Tools
If you're working with fiber optic connectors that require crimping, then a crimping tool is essential. Crimping is used to attach the connector to the cable securely. There are different types of crimping tools for different connector types, such as LC, FC, etc. Make sure you use the right crimping tool for the specific connector you're working with to ensure a proper and reliable connection.
Installation Process and the Use of Tools
Let's take a look at how these tools are used in a typical fiber optic cable assembly installation process.
First, you'll use the fiber optic stripper to remove the outer layers of the cable. This exposes the bare fiber. Then, use the cleaver to prepare the fiber end for splicing or termination. If you're splicing, use the fusion splicer to join the fibers together. After splicing, you can use the OTDR to test the splice and make sure there are no issues with signal loss.
When terminating the fiber, use the appropriate crimping tool to attach the connector. Before making the final connection, use the fiber optic inspection scope to check the end face of the connector for any contaminants.
Our Product Range and Installation
As a supplier of fiber optic cable assemblies, we offer a wide range of products, including [LC to LC Multi - Fiber Optic Jumper Cable](/fiber - optic - patch - cord/fiber - optic - cable - assemblies/multi - fiber - lc - to - lc - cable - assembly.html), [Multi - Fiber FC To FC Cable Assembly](/fiber - optic - patch - cord/fiber - optic - cable - assemblies/multi - fiber - fc - to - fc - cable - assembly.html), and [FC to FC Duplex Fiber Optic Jumper Cable](/fiber - optic - patch - cord/fiber - optic - cable - assemblies/fc - to - fc - duplex - cable - assembly.html). These products are designed to meet different needs in various applications, such as data centers, telecommunications, and local area networks.
When it comes to installation, having the right tools is just as important as having high - quality fiber optic cable assemblies. Our products are easy to install, but using the correct installation tools will ensure that you get the best performance out of them.
Why Choose Our Fiber Optic Cable Assemblies?
Our fiber optic cable assemblies are made with high - quality materials and undergo strict quality control. We ensure that each cable assembly meets the industry standards for performance and reliability. Whether you need a single - mode or multi - mode fiber optic cable assembly, we have the right product for you.
Contact Us for Procurement
If you're in the market for fiber optic cable assemblies or have any questions about the installation tools, don't hesitate to reach out. We're here to help you with your procurement needs and provide you with the best solutions for your fiber optic projects.
References
- "Fiber Optic Installation Handbook"
- "Optical Fiber Communications: Principles and Practice"
So, that's a wrap on the installation tools for fiber optic cable assemblies. I hope this blog post has been helpful to you. If you have any more questions, feel free to drop a comment or get in touch.