

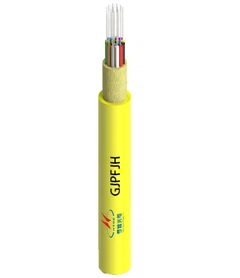


Hey there! As a supplier of MPO/MTP products, I often get asked about how to install MPO/MTP adapter panels. It might seem a bit daunting at first, but with the right steps and a bit of know - how, you'll have it up and running in no time. So, let's dive right in!


Step 1: Gather Your Tools and Materials
Before you start the installation, you need to make sure you've got everything you need. You'll need an MPO/MTP adapter panel, of course. And don't forget the right fiber optic cables. We offer a range of options like MPO To SC Fiber Optic Jumper Cable, MPO To LC Fiber Optic Jumper Cable, and MPO/MTP to FC Fanout Fiber Optic Jumper Cable.
Other tools include a screwdriver, cable ties, and a fiber optic cleaning kit. Cleaning the cables and the adapter panel is super important to ensure good signal transmission. You don't want any dust or dirt getting in the way of your high - speed data transfer.
Step 2: Choose the Right Location
Picking the right spot for your MPO/MTP adapter panel is crucial. It should be in a well - ventilated area, away from sources of heat and moisture. A data center rack is a common choice, but you can also mount it on a wall if that's more convenient for your setup.
Make sure there's enough space around the panel for easy access. You'll need to be able to plug and unplug cables, and perform maintenance in the future. And don't forget to consider cable management. You don't want a big mess of cables that could cause problems down the line.
Step 3: Mount the Adapter Panel
Once you've found the perfect location, it's time to mount the adapter panel. If you're using a rack, most panels come with mounting ears that you can attach to the rack using screws. Just line up the holes on the mounting ears with the holes in the rack and tighten the screws.
If you're mounting it on a wall, use wall - mounting brackets. Make sure the panel is level before you start screwing it in. A level panel not only looks better but also makes it easier to connect the cables later.
Step 4: Prepare the Fiber Optic Cables
Before you connect the cables to the adapter panel, you need to prepare them. Start by cleaning the connectors with the fiber optic cleaning kit. This removes any dust or debris that could interfere with the signal.
Next, check the cable length. You want the cables to be long enough to reach from the panel to their destination but not so long that they create a tangle. Use cable ties to bundle the cables together and keep them organized.
Step 5: Connect the Cables to the Adapter Panel
Now comes the fun part - connecting the cables to the adapter panel. Most MPO/MTP adapter panels have ports that are color - coded to match the cable connectors. This makes it easy to figure out which cable goes where.
Gently insert the cable connectors into the corresponding ports on the panel. Make sure they are fully seated. You should feel a slight click when the connector is properly inserted. If you're having trouble, double - check the orientation of the connector. Some connectors have a keying mechanism that ensures they are inserted correctly.
Step 6: Test the Connection
After you've connected all the cables, it's time to test the connection. You can use a fiber optic tester to check the signal strength and quality. This helps you identify any problems early on, like a loose connection or a damaged cable.
If the test results are not satisfactory, start by checking the connections. Make sure all the cables are properly inserted and that the connectors are clean. If the problem persists, you may need to replace a cable or check the equipment at the other end of the cable.
Step 7: Cable Management
Once you've confirmed that the connection is working, it's important to manage the cables properly. Use cable trays or cable management arms to route the cables neatly. This not only makes the installation look professional but also helps with future maintenance.
Label the cables so you know what each one is for. You can use cable labels or a label printer. This makes it easier to troubleshoot problems and make changes in the future.
Step 8: Final Checks
Before you call it a day, do a final check of the installation. Make sure all the cables are secure, the panel is properly mounted, and there are no loose screws. Check the overall appearance of the installation. A clean and organized setup is more reliable and easier to work with.
Troubleshooting Tips
Sometimes, things don't go as planned. Here are some common issues and how to fix them:
- Poor Signal Quality: As mentioned earlier, this could be due to dirty connectors or a loose connection. Clean the connectors and make sure the cables are fully inserted.
- Cable Breakage: If you suspect a cable is broken, use a cable tester to locate the break. You may need to replace the damaged cable.
- Incorrect Cable Routing: If the cables are routed in a way that causes them to bend too sharply, it can affect the signal. Re - route the cables to avoid sharp bends.
Conclusion
Installing an MPO/MTP adapter panel might seem like a complex task, but if you follow these steps, you'll be able to do it like a pro. Remember to take your time, be careful with the cables, and always test the connection.
If you're in the market for high - quality MPO/MTP products, we've got you covered. We offer a wide range of products, including the cables I mentioned earlier. Whether you're setting up a small office network or a large data center, we have the solutions you need.
If you have any questions or want to discuss your specific requirements, feel free to reach out. We're here to help you make the right choices for your network installation. Let's work together to build a reliable and efficient fiber optic network!
References
- Fiber Optic Association. "Fiber Optic Installation Best Practices."
- Telecommunications Industry Association (TIA) standards for fiber optic installations.