



Hey there! As a supplier of fire resistant fiber optic cables, I often get asked about the installation process. So, I thought I'd put together this blog post to walk you through it.
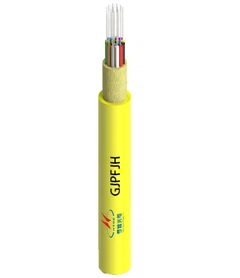
Let's start with a bit of background. Fire resistant fiber optic cables are designed to maintain their functionality even in the presence of fire. They're crucial in areas where safety is a top priority, like hospitals, data centers, and high - rise buildings. We offer a variety of these cables, such as the Fire Resistant Multi Tube Single Jacket Single Armored Cable, Fire Resistant Center Tube Single Jacket Steel Tape Armored Cable, and Fire Resistant Multi Tube Double Jacket Double Armored Cable.


Pre - installation Checks
Before you start installing the fire resistant fiber optic cable, there are a few things you need to do.
First off, you've gotta check the cable itself. Inspect it for any visible damage, like cuts, kinks, or crushed areas. A damaged cable can lead to signal loss or even complete failure, so it's super important to catch these issues early. You should also make sure the cable has the right specifications for your project. Check the number of fibers, the fiber type (single - mode or multi - mode), and the cable length.
Next, take a look at the installation environment. Measure the route where the cable will be installed. Make sure there are no obstacles like sharp edges, pipes, or other cables that could damage the fire resistant fiber optic cable. If there are any potential hazards, you'll need to find a way to either remove them or protect the cable from them. Also, check the temperature and humidity of the area. Extreme conditions can affect the performance of the cable, so you might need to take extra precautions if the environment is not ideal.
Tools and Equipment
You'll need a bunch of tools for the installation. Here's a basic list:
- Cable cutters: These are used to cut the fire resistant fiber optic cable to the right length. Make sure they're sharp so you can get a clean cut.
- Fiber strippers: They're used to remove the outer jacket and buffer coating of the cable to expose the fibers.
- Cleavers: To get a clean break on the fiber ends for splicing or termination.
- Splicing equipment: If you need to join two cables together, you'll need a fusion splicer or mechanical splice kits.
- Termination kits: For attaching connectors to the ends of the cable.
- Cable pullers: If you're installing the cable over a long distance, cable pullers can help you get it in place without causing too much stress on the cable.
- Safety gear: This includes gloves, safety glasses, and a hard hat to protect yourself during the installation.
Installation Steps
Step 1: Cable Routing
The first step in the actual installation is to route the fire resistant fiber optic cable. Start by laying out the cable along the planned route. Use cable trays, conduits, or raceways to support the cable and protect it from damage. Make sure the cable has enough slack at the bends and corners to prevent it from being over - stressed. You can use cable ties to secure the cable to the supports at regular intervals.
Step 2: Splicing (if needed)
If you have two or more cables that need to be joined together, splicing is the way to go. There are two main types of splicing: fusion splicing and mechanical splicing.
Fusion splicing is a more permanent and reliable method. It involves using a fusion splicer to melt the two fiber ends together. First, you need to strip the outer jacket and buffer coating of the cables using fiber strippers. Then, clean the fibers with isopropyl alcohol to remove any dirt or debris. Next, use a cleaver to get a clean break on the fiber ends. Place the fibers in the fusion splicer, and the machine will align them and melt them together. After splicing, protect the splice with a splice protector.
Mechanical splicing is a quicker and less expensive option. It uses mechanical splice kits to hold the two fiber ends together. Similar to fusion splicing, you first strip and clean the fibers. Then, insert the fibers into the mechanical splice and secure them using the provided clamps or adhesives.
Step 3: Termination
Termination is the process of attaching connectors to the ends of the fire resistant fiber optic cable. There are different types of connectors, such as SC, LC, and ST connectors.
To terminate the cable, start by stripping the outer jacket and buffer coating to expose the fibers. Clean the fibers and use a cleaver to get a clean end. Insert the fiber into the connector body and use the termination kit to secure it. You may need to use epoxy or other adhesives to hold the connector in place. After the connector is attached, polish the end face of the connector to ensure a good optical connection.
Step 4: Testing
Once the cable is installed, spliced, and terminated, it's time to test it. You can use an optical time - domain reflectometer (OTDR) to measure the loss of the cable and check for any faults. The OTDR sends a light pulse into the cable and measures the reflected light. It can tell you if there are any breaks, bends, or splice losses in the cable. You should also test the continuity of the cable using a light source and a power meter. Connect the light source to one end of the cable and the power meter to the other end. If the power meter detects light, it means the cable is working properly.
Post - installation Checks
After the installation and testing are done, do a final check. Make sure all the cable connections are secure and there are no loose ends. Check the cable management to ensure that the cable is properly supported and protected. Also, document the installation process, including the cable length, splice locations, and test results. This documentation can be useful for future maintenance and troubleshooting.
Maintenance
Fire resistant fiber optic cables don't require a ton of maintenance, but there are still a few things you should do. Regularly inspect the cable for any signs of damage, like cracks in the jacket or signs of water ingress. Clean the connectors periodically to remove any dust or dirt that could affect the signal. If you notice any issues, address them as soon as possible to prevent further damage.
Why Choose Our Fire Resistant Fiber Optic Cables
Our fire resistant fiber optic cables are made with high - quality materials that ensure excellent performance and reliability. They meet all the relevant safety standards, so you can be confident in their ability to withstand fire and other harsh conditions. Plus, our cables come in a variety of options, so you can choose the one that best fits your needs.
If you're interested in purchasing our fire resistant fiber optic cables or have any questions about the installation process, don't hesitate to get in touch. We're here to help you with your project from start to finish. Whether you're a small business or a large corporation, we can provide you with the right cables and support.
References
- Fiber Optic Association (FOA). Fiber Optic Installation Manual.
- Telecommunications Industry Association (TIA). Standards for Fiber Optic Cabling.
That's it for this blog post on the installation process of fire resistant fiber optic cables. I hope you found it helpful. If you have any more questions, feel free to leave a comment below.