

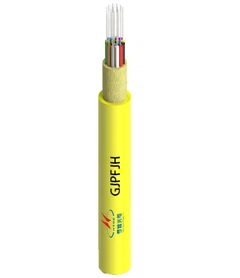


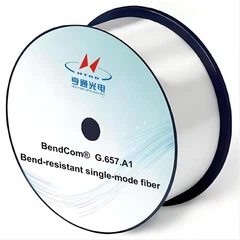
Hey there! As a supplier of FTTH drop cables, I've seen firsthand how crucial these cables are for hotels aiming to provide high - speed internet to their guests. In this blog, I'll walk you through the installation steps for an FTTH drop cable in a hotel.
Step 1: Planning and Survey
Before you start any installation, a detailed plan and survey are a must. First off, you need to figure out the layout of the hotel. Walk through each floor, room, and common area to identify the best routes for the cable. Consider factors like existing electrical wiring, plumbing, and structural elements. You don't want to run into any surprises during the installation process.
Meet with the hotel management and staff. They can provide valuable insights into areas that are frequently used by guests and areas that might be off - limits. This way, you can ensure that the installation won't disrupt the hotel's normal operations.
Also, check local building codes and regulations. Some areas have specific requirements for cable installation, especially when it comes to fire safety and signal interference. Make sure you're compliant from the get - go to avoid any legal issues down the road.
Step 2: Choosing the Right Cable
There are different types of FTTH drop cables available, and selecting the right one is key. For hotels, you need cables that can withstand a bit of wear and tear, as well as provide stable high - speed connections.
One popular option is the Figure 8 Indoor Optical Cable. This cable is great for indoor use, especially in areas where there's a need for easy installation and flexibility. It's designed to be lightweight and easy to handle, making it a good choice for running through walls and ceilings in hotel rooms.
Another option is the Duct Drop Butterfly Cable. If you're planning to run the cable through ducts or conduits, this is the way to go. It has a flat, butterfly - shaped design that allows it to fit easily into tight spaces, and it's also resistant to environmental factors like moisture and dust.
The Indoor Outdoor Round Drop Cable is a versatile choice. As the name suggests, it can be used both indoors and outdoors. This is useful if you need to connect the hotel's internal network to an external fiber source. It's more durable and can handle different weather conditions.

Step 3: Preparing the Installation Tools
Once you've chosen the cable, it's time to gather the necessary tools. You'll need basic tools like cable cutters, strippers, and crimpers. These are essential for cutting the cable to the right length, removing the outer insulation, and attaching connectors.
A fish tape or a pull string is also very useful. This helps you run the cable through walls, ceilings, and ducts. You can feed the fish tape through the space first and then attach the cable to it and pull it through.
For testing the cable, you'll need an optical time - domain reflectometer (OTDR) and a light source and power meter. These tools allow you to check the quality of the cable connection and make sure there are no breaks or signal losses.
Step 4: Cable Installation
Now, let's get to the actual installation. Start from the main distribution point, which is usually where the external fiber connection comes into the hotel. This could be a basement or a utility room.
Run the main trunk cable from the distribution point to the different floors of the hotel. Use the fish tape or pull string to guide the cable through the vertical shafts or conduits. Make sure to leave some extra slack at each floor for future maintenance and adjustments.
On each floor, branch out the cable to the individual rooms and common areas. You can use wall plates and junction boxes to connect the cables and make the connections look neat. When running the cable through walls, drill small holes and use cable protectors to prevent the cable from getting damaged.
In the hotel rooms, install the cable outlets near the desks or other areas where guests are likely to use their devices. Make sure the outlets are easily accessible and properly labeled.
Step 5: Cable Termination and Testing
After the cable is installed, it's time to terminate the ends. Use the cable strippers to remove the outer insulation and expose the fiber strands. Then, use the crimpers to attach the connectors to the fiber ends. Make sure the connectors are properly aligned and tightened to ensure a good connection.
Once the termination is done, it's time to test the cable. Use the OTDR to check for any breaks or signal losses along the cable. The light source and power meter can be used to measure the signal strength at the outlets. If you find any issues, go back and check the connections or look for any damaged sections of the cable.
Step 6: Documentation and Maintenance
Finally, document the entire installation process. Keep records of the cable routes, the type of cable used, the location of the outlets, and the test results. This documentation will be useful for future maintenance and troubleshooting.
Set up a regular maintenance schedule for the cable system. Check the connections periodically to make sure they're still tight and there are no signs of wear or damage. Also, keep an eye on the signal quality and make any necessary adjustments.
If you're a hotel owner or a manager looking to install FTTH drop cables, I'd love to help. We have a wide range of high - quality cables and the expertise to ensure a smooth installation process. If you're interested in learning more or want to discuss your specific needs, feel free to reach out. We can provide you with detailed quotes and answer any questions you might have.
References
- Telecommunications Industry Association (TIA) standards for fiber optic cable installation.
- Local building codes and regulations for your area.