



Hey there! As a supplier of FTTH drop cables, I've seen my fair share of damaged cables. It's a common issue that can disrupt internet services and cause a whole lot of headaches for both homeowners and businesses. But don't worry, replacing a damaged FTTH drop cable isn't as complicated as it might seem. In this blog post, I'll walk you through the process step by step, so you can get your internet up and running again in no time.
Step 1: Assess the Damage
The first thing you need to do is figure out how bad the damage is. Take a close look at the cable to see where it's damaged. Is it a small cut, a big break, or something else? Sometimes, the damage might be obvious, like a visible cut in the cable. Other times, it might be more hidden, so you'll need to be extra careful when checking.
If the cable is just a little bit damaged, you might be able to fix it with some simple repairs. But if it's badly damaged, you'll probably need to replace the whole cable. It's important to be honest with yourself about the extent of the damage, so you can make the right decision.
Step 2: Gather the Necessary Tools and Materials
Once you've decided to replace the cable, it's time to gather all the tools and materials you'll need. Here's a list of the basic stuff you'll likely need:
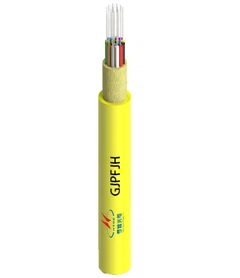
- New FTTH drop cable: You can choose from different types, like the Indoor Outdoor Round Drop Cable, Self-supporting Butterfly Lead-in Fiber Optical Cable, or Figure 8 Indoor Optical Cable. Pick the one that suits your needs best.
- Cable cutters: These are used to cut the old cable and the new one to the right length.
- Fiber optic strippers: You'll need these to remove the outer coating of the fiber optic cable.
- Connectors: Make sure you get the right connectors for your cable.
- Splicing kit (if needed): If you're splicing the cable, this kit will have everything you need.
- Safety equipment: This includes gloves and safety glasses to protect yourself.
Step 3: Turn Off the Power
Before you start working on the cable, it's really important to turn off the power. This is to prevent any electrical shocks or damage to the equipment. Locate the power source for the FTTH system and switch it off. It's better to be safe than sorry!
Step 4: Remove the Old Cable
Now it's time to take out the old, damaged cable. Start by carefully disconnecting it from the equipment at both ends. This might involve removing connectors or unclipping the cable from brackets. Once it's disconnected, gently pull the cable out of its route. Be careful not to damage any other cables or equipment while you're doing this.
Step 5: Install the New Cable
Once the old cable is out, it's time to put in the new one. First, measure the length of the new cable you need. It's a good idea to add a little extra length, just in case. Then, use the cable cutters to cut the new cable to the right size.
Next, route the new cable along the same path as the old one. Make sure it's properly secured with clips or brackets to keep it in place. If you need to splice the cable, follow the instructions in the splicing kit carefully. And if you're using connectors, attach them to the ends of the cable according to the manufacturer's instructions.
Step 6: Connect the Cable to the Equipment
After the new cable is installed, it's time to connect it to the equipment. Start by connecting one end of the cable to the optical network terminal (ONT) or whatever device it's supposed to go to. Then, connect the other end to the corresponding equipment at the other end. Make sure the connections are tight and secure.


Step 7: Test the Connection
Once everything is connected, it's time to test the connection. Turn on the power and check if the internet is working. You can do this by opening a web browser and trying to access a website. If the connection is working, great! If not, double-check all the connections and make sure everything is installed correctly. If you're still having problems, you might need to call in a professional.
Step 8: Clean Up
After you've successfully replaced the cable and tested the connection, it's time to clean up. Put away all the tools and materials you used. Dispose of the old cable properly. And make sure the area where you worked is clean and tidy.
Why Choose Our FTTH Drop Cables?
As a supplier, I can tell you that our FTTH drop cables are top-notch. We use high-quality materials and advanced manufacturing processes to ensure that our cables are reliable and durable. Whether you need an indoor or outdoor cable, we've got you covered. Our cables are designed to provide high-speed internet connections and are resistant to environmental factors like moisture and temperature changes.
If you're in the market for FTTH drop cables or have any questions about cable replacement, don't hesitate to get in touch. We're here to help you make the right choice and ensure that your internet connection is up and running smoothly. Just reach out to us, and we'll be happy to assist you with your procurement needs.
References
- General knowledge about FTTH drop cable installation and replacement from industry experience.
- Manufacturer's guides for the tools and materials used in the process.