

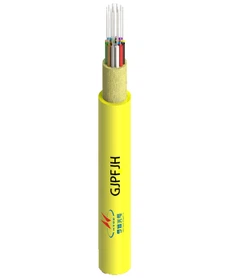


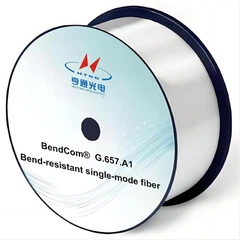
Installing fiber optic jumpers in a tight space can be a challenging yet crucial task, especially in modern data centers, telecommunications closets, and other high - density networking environments. As a fiber optic jumper supplier, I've encountered numerous scenarios where technicians are faced with the dilemma of installing these essential components in a confined area. In this blog, I'll share some practical tips and techniques to help you successfully install fiber optic jumpers in tight spaces.


Pre - installation Planning
Before you even start the installation process, proper planning is key. This involves a thorough assessment of the space and the requirements of the fiber optic network.
Space Assessment
Measure the available space accurately. Note down the dimensions, including height, width, and depth. Identify any obstacles such as existing cables, equipment, or structural elements that might impede the installation. This will help you determine the type and length of fiber optic jumpers that can fit into the space. For example, in a very narrow rack, you might need to use shorter jumpers to avoid excessive cable bending or crowding.
Network Requirements
Understand the specific needs of the network. Determine the number of jumpers required, the type of connectors (such as SC Duplex Pigtail, LC To LC Duplex Fiber Optic Jumper, or LC Pigtail), and the transmission speed. This information will guide you in selecting the appropriate jumpers for the installation.
Selecting the Right Fiber Optic Jumpers
The choice of fiber optic jumpers is critical when working in a tight space.
Connector Type
Opt for connectors that are compact and easy to install. LC connectors are a popular choice for tight spaces due to their small form factor. They take up less space compared to larger connectors like SC, allowing for more jumpers to be installed in a limited area.
Cable Bend Radius
Ensure that the fiber optic jumpers you select have a suitable bend radius. A smaller bend radius means the cable can be bent more tightly without causing signal loss. This is essential in tight spaces where cables may need to be routed around corners or through narrow gaps.
Cable Length
Choose the appropriate cable length. In a tight space, longer cables can lead to unnecessary clutter and make the installation more difficult. Measure the distance between the connection points accurately and select jumpers that are just long enough to reach without excess slack.
Installation Tools and Techniques
Having the right tools and using proper techniques can make the installation process much smoother.
Tools
- Fiber Optic Cleaver: This tool is used to make a clean, precise cut on the fiber optic cable, ensuring optimal signal transmission.
- Connector Installation Kit: It includes all the necessary components and tools for installing connectors on the fiber optic cables.
- Cable Ties and Clips: These are used to secure the cables in place and prevent them from moving or getting tangled.
- Flashlight or Headlamp: In a tight space, visibility can be limited. A flashlight or headlamp will help you see the connection points clearly.
Installation Techniques
- Cable Management: Start by organizing the cables. Use cable ties and clips to group the cables together and keep them in an orderly manner. This will make it easier to route the cables through the tight space and reduce the risk of tangling.
- Connector Installation: Follow the manufacturer's instructions carefully when installing the connectors. Make sure the fiber is properly aligned and the connector is securely attached. A loose or misaligned connector can cause signal loss or complete failure.
- Routing the Cables: When routing the cables, try to use the natural pathways in the space. Avoid sharp bends or kinks in the cables. If possible, use cable trays or conduits to guide the cables and protect them from damage.
Testing and Troubleshooting
After the installation is complete, it's important to test the fiber optic jumpers to ensure they are working properly.
Testing
- Optical Time - Domain Reflectometer (OTDR): This device is used to measure the length of the fiber optic cable, detect any breaks or bends, and assess the overall quality of the signal.
- Light Source and Power Meter: These tools are used to measure the power of the light signal at the input and output of the fiber optic jumper. A significant difference in power levels may indicate a problem with the installation.
Troubleshooting
If you encounter any issues during testing, such as low signal strength or intermittent connectivity, check the following:
- Connector Connections: Make sure the connectors are properly seated and tightened. A loose connection can cause signal loss.
- Cable Damage: Inspect the cables for any visible damage, such as cuts or kinks. If damage is found, replace the affected cable.
- Bend Radius: Check that the cables are not bent beyond their recommended bend radius. Excessive bending can cause signal loss.
Conclusion
Installing fiber optic jumpers in a tight space requires careful planning, the right selection of jumpers, proper tools and techniques, and thorough testing. By following the tips and guidelines outlined in this blog, you can ensure a successful installation and a reliable fiber optic network.
If you're in need of high - quality fiber optic jumpers for your next project, whether it's in a tight space or not, we're here to help. As a leading fiber optic jumper supplier, we offer a wide range of products, including SC Duplex Pigtail, LC To LC Duplex Fiber Optic Jumper, and LC Pigtail. Contact us today to discuss your specific requirements and let's work together to find the best solutions for your networking needs.
References
- "Fiber Optic Installation Handbook" by John Doe
- "Network Cabling Standards and Best Practices" published by the Institute of Electrical and Electronics Engineers (IEEE)
- Manufacturer's documentation for fiber optic jumpers and installation tools