

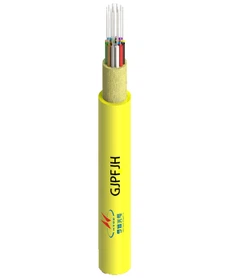


Hey there! As a supplier of anti rodent fiber optic cable, I'm super stoked to share with you how to install this awesome cable in a cable tray. It's not as hard as it might seem, and I'll walk you through the whole process step by step.
First off, let's talk about why you'd even want to use anti rodent fiber optic cable. Rodents can be a real pain in the you - know - what when it comes to fiber optic cables. They love to chew on cables, which can lead to signal loss, expensive repairs, and a whole lot of headaches. That's where our Anti - rodent Fiber Optic Cable comes in. It's designed to withstand those pesky critters and keep your network up and running smoothly.
Preparation Before Installation
Before you start the actual installation, you need to do some prep work. First, make sure you've got all the tools you'll need. You'll need cable cutters, cable ties, a measuring tape, and a ladder if the cable tray is up high. It's also a good idea to have a safety harness if you're working at height.
Next, measure the length of cable you'll need. You don't want to end up with too much or too little cable. Measure twice, cut once, as they say. Make sure to account for any bends or turns in the cable tray.
Inspect the cable tray itself. It should be clean and free of any debris or sharp edges that could damage the cable. If there are any sharp edges, use a file or sandpaper to smooth them out.
Unloading and Handling the Cable
When the cable arrives, handle it with care. Our anti rodent fiber optic cables are pretty tough, but they're still delicate in some ways. Don't drag the cable on the ground or let it get kinked. Roll it out gently onto a clean surface.
Check the cable for any visible damage. If you notice any cuts, abrasions, or other issues, contact us right away. We'll make sure you get a replacement cable.
Installing the Cable in the Cable Tray
Now, it's time to start installing the cable in the cable tray. Start at one end of the tray and carefully place the cable inside. You can use cable ties to secure the cable to the tray at regular intervals. Make sure the cable ties aren't too tight, as this could damage the cable.
As you're laying the cable, try to keep it as straight as possible. Avoid sharp bends or twists. If you need to make a turn, use a gentle curve. Our Anti Rodent Single Jacket Stainless Steel Tape Armored Cable is flexible enough to handle these curves without any problems.
If you're installing multiple cables in the same tray, keep them organized. You can use different colored cable ties or labels to tell them apart. This will make it easier to troubleshoot any issues in the future.
Connecting the Cable
Once the cable is in the tray, you'll need to connect it to the appropriate equipment. This might involve splicing the cable or using connectors. If you're not experienced with this, it's a good idea to hire a professional. But if you're feeling confident, make sure you follow the manufacturer's instructions carefully.
When splicing the cable, make sure the ends are clean and properly aligned. Use a splicing machine to make a strong, reliable connection. If you're using connectors, make sure they're compatible with the cable and the equipment.
Testing the Cable
After the cable is connected, it's time to test it. Use a fiber optic tester to check the signal strength and quality. Make sure there are no breaks or interference in the cable. If the test results aren't what you expect, go back and check your connections and the cable itself for any issues.


Securing and Labeling
Once the cable is installed and tested, secure it properly in the cable tray. Double - check all the cable ties to make sure they're tight enough but not too tight. You can also use additional supports if needed.
Label the cable clearly. Include information like the cable type, the destination, and any other relevant details. This will make it easier to identify the cable in the future if you need to make any changes or repairs.
Maintenance Tips
After the installation is complete, it's important to do some regular maintenance. Check the cable periodically for any signs of damage or wear. Look for any signs that rodents might have tried to chew on the cable, even though our Multi Tube Double Jacket Stainless Steel Tape Armored Anti Rodent Cable is designed to resist them.
Keep the cable tray clean. Remove any dust, dirt, or debris that might accumulate over time. This will help prevent any issues with the cable.
Why Choose Our Anti Rodent Fiber Optic Cables
Our anti rodent fiber optic cables are top - notch. They're made with high - quality materials and are rigorously tested to ensure they meet the highest standards. We offer a wide range of options, so you can choose the cable that's right for your specific needs.
Whether you're setting up a small home network or a large commercial network, our cables can handle it. And because they're anti rodent, you can have peace of mind knowing that your network is protected from those annoying critters.
Let's Connect
If you're interested in purchasing our anti rodent fiber optic cables or have any questions about the installation process, don't hesitate to reach out. We're here to help you every step of the way. Whether you're a DIY enthusiast or a professional installer, we've got the products and the knowledge to support you.
References
- "Fiber Optic Installation Handbook" - A comprehensive guide on fiber optic installation techniques.
- "Rodent - Resistant Cable Design and Testing" - A study on the effectiveness of different anti rodent cable designs.